These instructions worked for me to setup 2 wireless routers having same SSID with a single Internet connection.
Note: Both routers connect to each other wirelessly so this setup is useful when it is not possible to connect both routers through a wire.
My host wireless router is Cisco Linksys WRT54GS on which I installed DD-WRT firmware. This router is connected to the cable modem for the WAN connectivity.
Note: You should consult http://dd-wrt.com for how to flash your router with DD-WRT and pay attention to step-by-step process.
I have another Cisco Linksys E1000 router which is not connected to the cable modem and we want to connect it wirelessly to the host router. I installed DD-WRT on this router also.
This setup also works for 2 homes who want to share the cost of the same internet connection. This may be useful for countries where internet cost is high.
This article assumes that you know how to flash your routers with DD-WRT firmware on your router and make sure that you get the right version for your make of the router. It is recommended to use same routers and look at the dd-wrt site for the recommendations.
Assumptions:
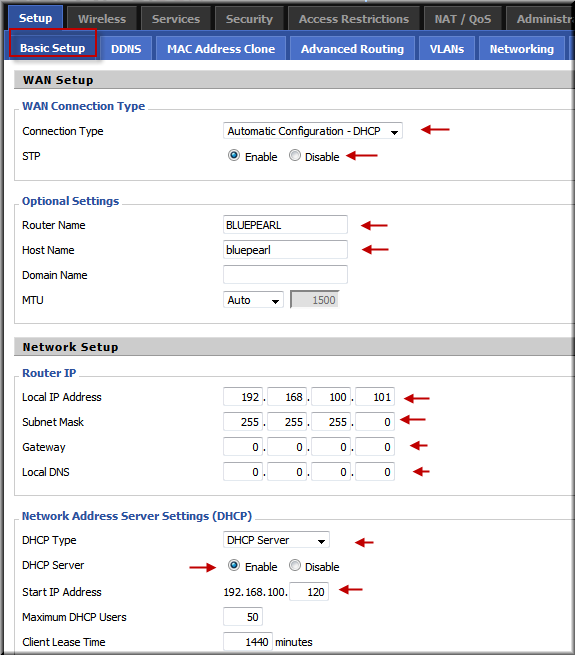
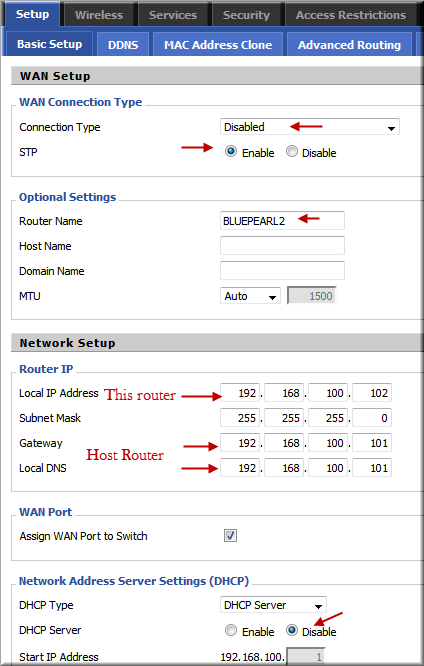
1. I am calling router connected to the modem as a host router. I set the IP address of this router as 192.168.100.101
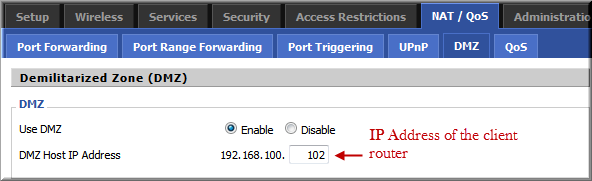
2. The router which will be used to connect to the host router will be called as a client router which is not connected to the cable or DSL modem. This router is used to extend the reach of your wireless network. I set the IP address of this router as 192.168.100.102.
[Read instructions at http://dd-wrt for how to change the IP address of the router after flashing it.]
Host Router Set up
http://192.168.100.101
Setup > Basic Setup
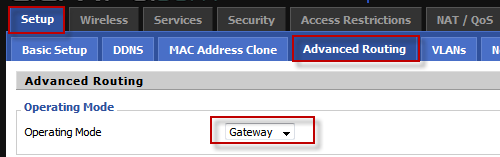
Setup > Advanced Routing
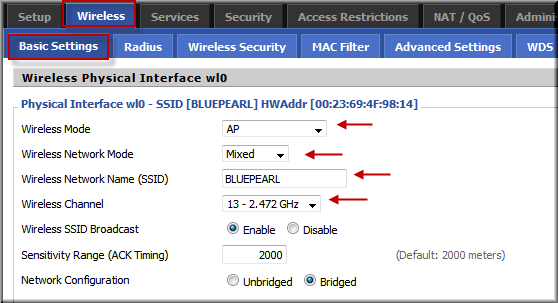
Wirelss > basic Settings
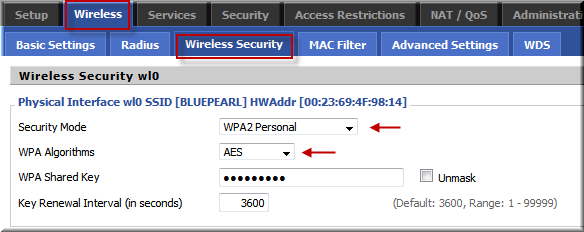
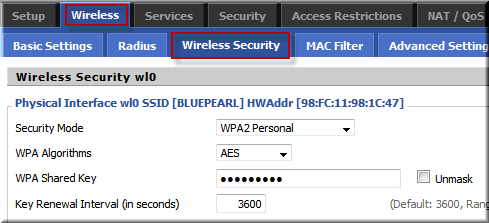
Wireless > Wireless Security
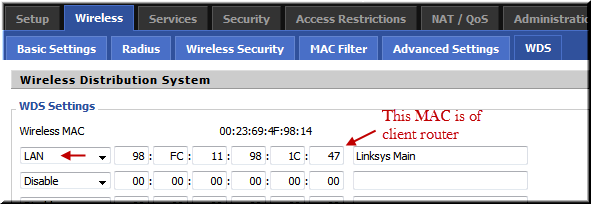
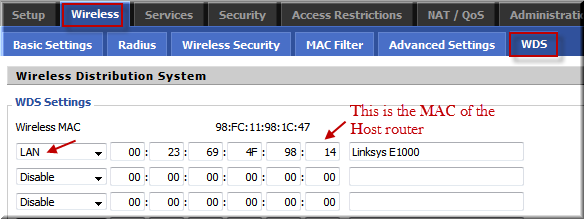
Wireless > WDS (This allows both routers to talk to each other using wireless)
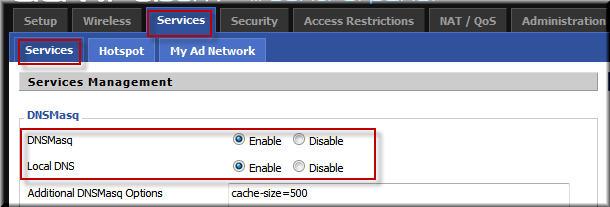
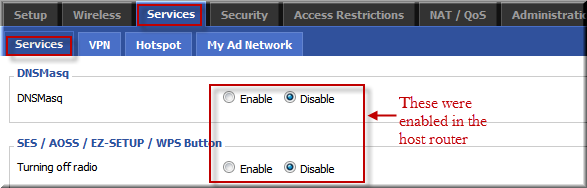
Services > Services (Make sure that only host router is providing this service)
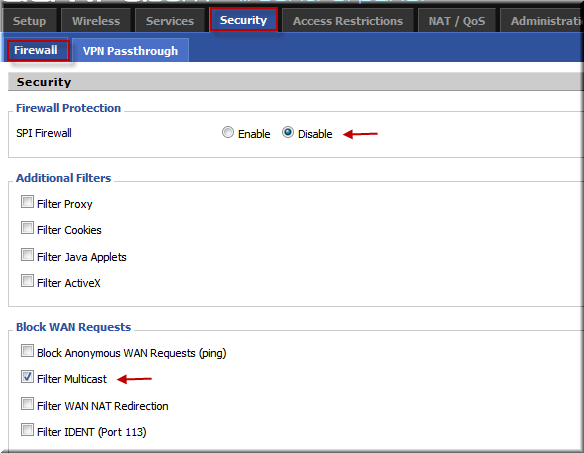
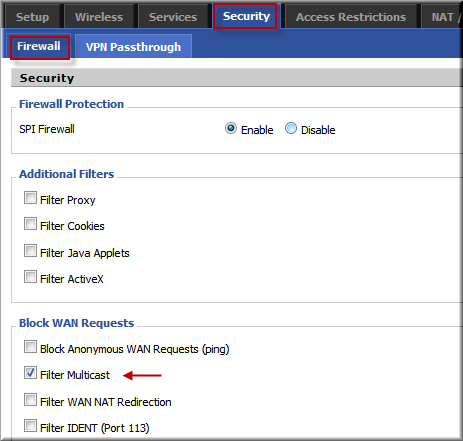
Security > Firewall
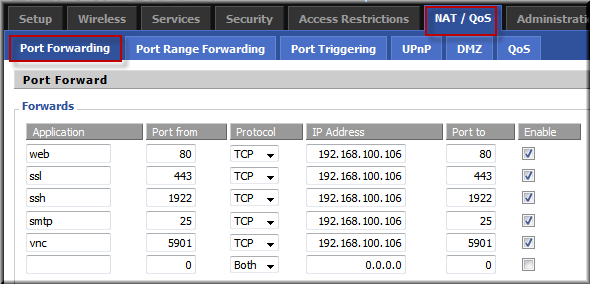
NAT / QoS > Port Forwarding (This is my setup to do the port forward to host sites. e.g This site is hosted on 192.168.100.106 which is Linux server.)
NAT/QoS / DMZ – Put client router in DMZ
Client Router Set up
Setup > Basic Setup (GW and DNS should point to the host router and disable DHCP)
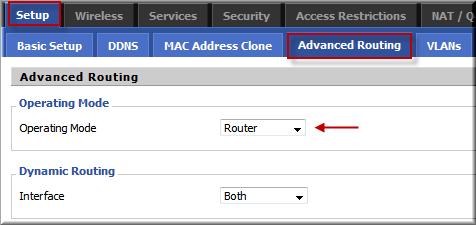
Setup > Advanced Routing (The operation mode is router. The host router operation mode was gateway.)
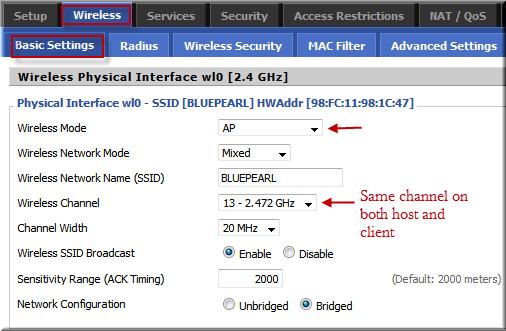
Wireless > Basic Settings (Wireless mode is AP for both routers and same wireless channel)
Wireless > Wireless Security (Use same on both the routers)
Wireless > WDS (This is the key for both routers to talk together using wireless)
Services > Services (Disable DNS)
Security > Firewall
Shutdown Host Router and power it again after 20 seconds
Shutdown Client Router and power it again after 20 seconds
Wait for 3 minutes
Go to the Host Router http://192.168.100.101
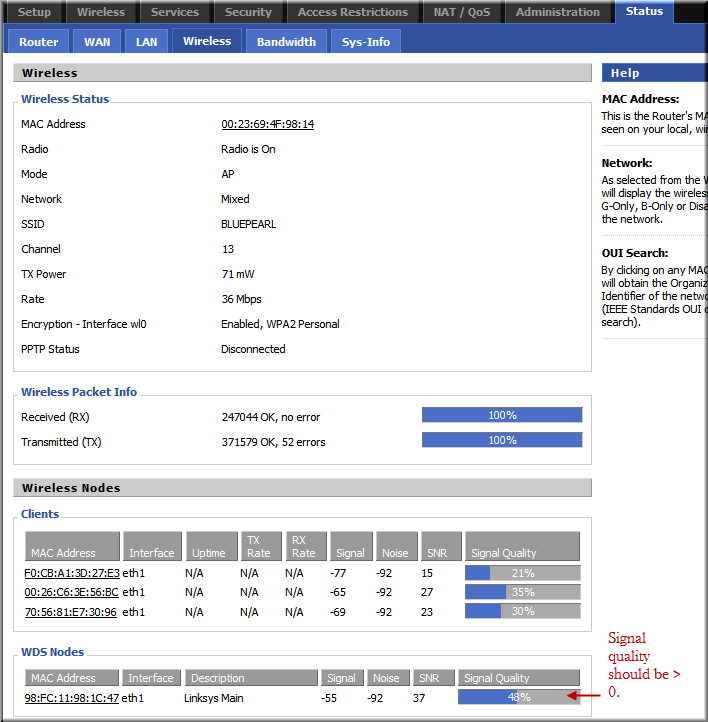
Status > Wireless (WDS nodes signal strength should show > 0)
Go to the client Router: http://192.168.100.102
Status > Wireless

Note: I changed wireless channel from 13 to 9 as I realized that channel 13 is not authorized for use in US. I realized this when my Apple MacBook Pro did not see my SSID since it was on channel 13. The default channel on most router is 6 so we should avoid using 6 as most of people in our neighbohood will be using the default channel.
The key here is WDS nodes and check regularly Status > Wireless to make sure that the signal strength is > 0 and if both routers show client list, your setup is working.
If these instructions work for you – great otherwise I documented these so that I could repeat these in future without having to go through many google search.
I am a database person so I know little on network. I understand that loopback is not working in DD-WRT and if I try to use some iptables rules given on google, it disables WDS which is not I want. I know that this is possible but needs to do some port forwarding using iptables in DD-WRT.