==============================================================
UPDATE for DB2 10.5
Everything holds good for DB2 10.5 except that you need to set the following db2 registry variables after DB2 pureScale instance in created.
db2set DB2_SD_SOCKETS_RESTRICTIONS=false
db2set DB2_CA_TRANSPORT_METHOD=SOCKETS
===============================================================
For learning and testing purposes DB2 10.1 pureScale, follow this guide to build a 4 node VM.
Follow these steps:
- Download Try and Buy DB2 10.1 from http://tinyurl.com/7zv8ydg
- Download Try and Buy VMware Workstation 8.0.4 from VMware
- Download Try and Buy SLES 11 SP1 from http://www.suse.com/promo/sle11sp1.html
- Buy yourself a 16GB Intel Core i7 W530 laptop from http://www.lenovo.com/products/us/laptop/thinkpad/w-series/w530
Note: It is not an endorsement for any product but this is what I used to learn DB2 pureScale on my own. If you acquire DB2 pureScale expertise, you can one of the very few DB2 DBA who will have a much more market value than a regular DBA. This is the newest IBM technology which is poised to be a great career boost for you and if you want a have a niche for yourself.
There are not even a single commercial training institutes today which offer this technology so get ahead of the curve and update your resume that you know how to manage a DB2 pureScale system.
DB2 pureScale is a combination of 4 IBM great technologies such as DB2, GPFS, RSCT and Tivoli SA MP.
- GPFS (General Parallel File System) – My one of the best favorite IBM technology for which IBM actually does not do any advertisement. This is not new and it is 20 years old mature technology.
- RSCT (Reliable Scalable Cluster Technology) – This is one of least advertised but most powerful clustering technology available from IBM. Again, IBM does not do a great job of marketing its own best technologies. RSCT is like an operating system for the clustering technology.
- Tivoli SA MP (Tivoli System Automation for Multi Platfform). This is an application of RSCT. Consider this like Microsoft Word and RSCT like Windows operating system.
- DB2 – You probably already know this.
These steps may not be very exhaustive but they provide a overall direction to reach to your goal. If you get stuck, send me a note at vikram at zinox.com.
Create pureScaleNode01
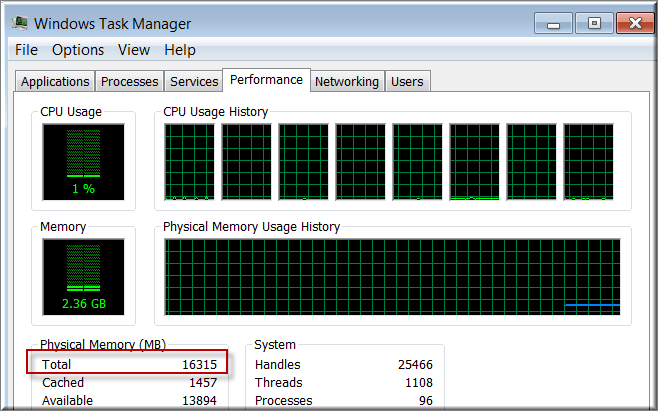
You need minimum 16GB of RAM with Intel Core i7 processor.
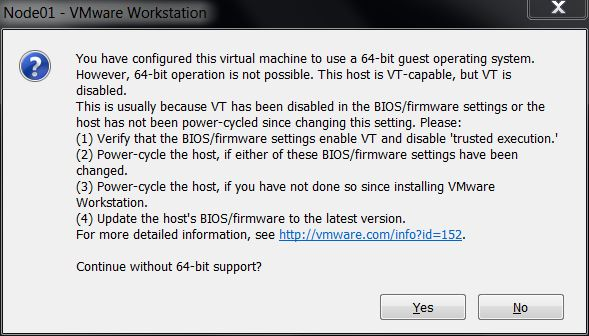
Make sure that the Virtulization is turned on your W520/W530 laptop. If it is not turned on, you may get the following message when you Power on a VM.
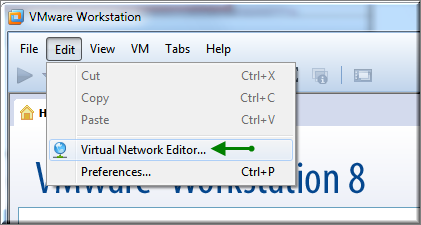
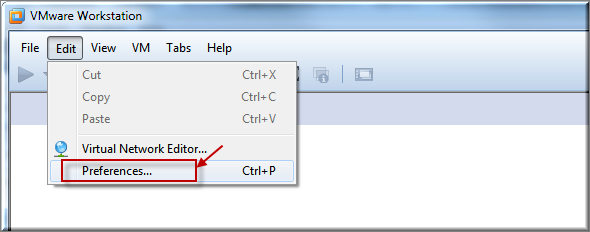
Setup the IP address of the VM adapter. Click Edit > Virtual Network Editor
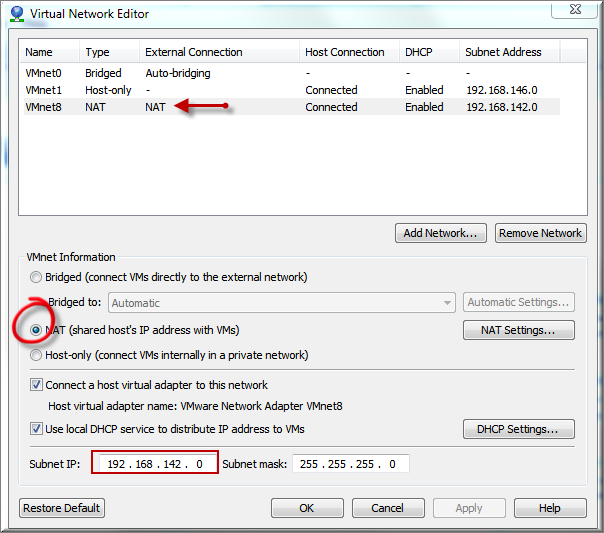
Click to select VMnet8 NAT network adapter. Make sure that the subnet IP address is selected to 192.168.142.0.
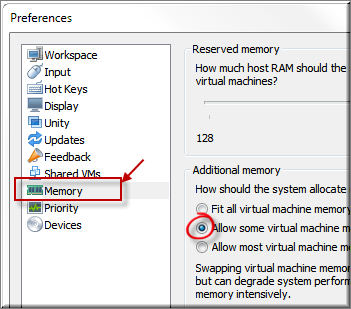
From your VMware workstation, Click to Edit > Preferences.
Select Memory.
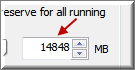
Change the memory to 14848 MB. Click OK.
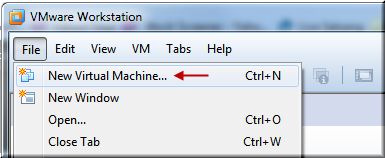
Click File > New Virtual Machine
Check Custom radio button and click Next.
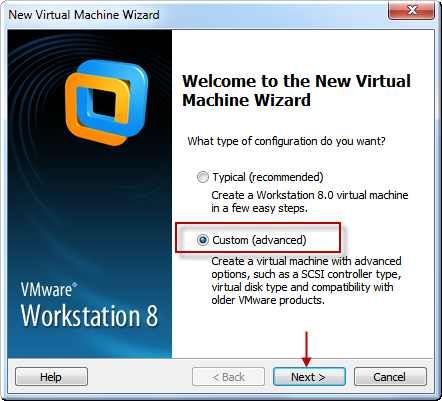
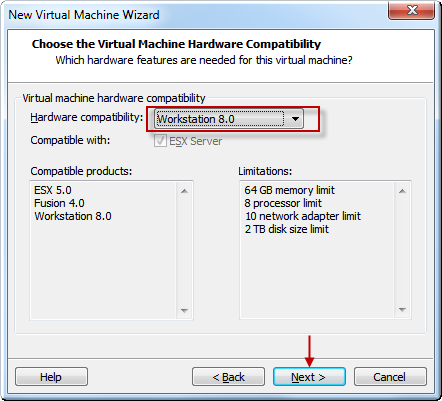
Click Next.
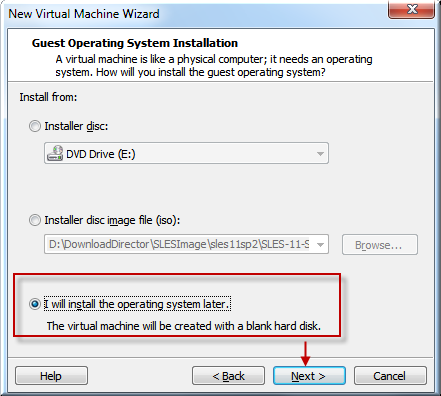
Check to install operating system later. Click Next.
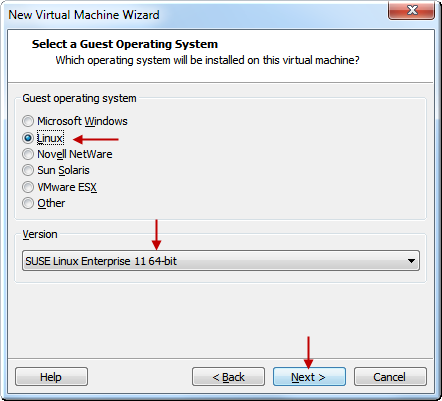
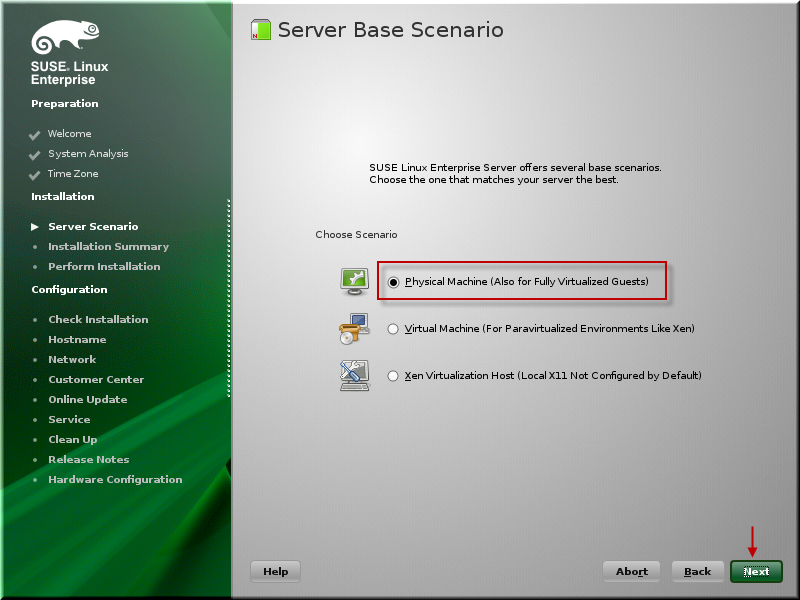
Select Linux and SLES 11 64-bit. Click Next.
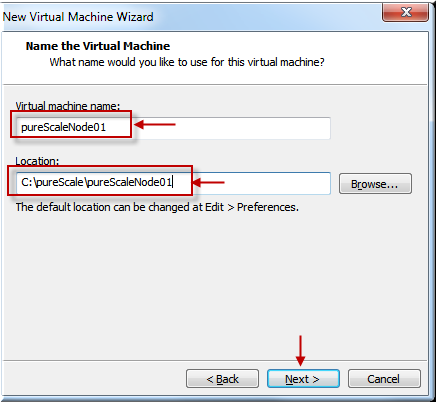
Give a name (pureScaleNode01) and specify a directory (C:\pureScale\pureScaleNode01) where the VM needs to reside. Click Next.
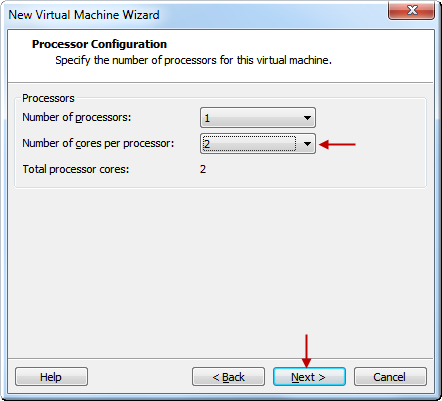
Select 2 cores and click Next.
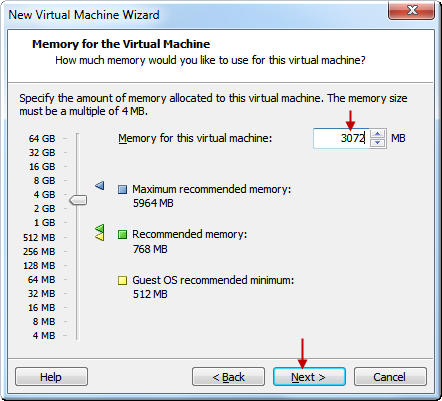
Specify Memory 3072 MB and click Next.
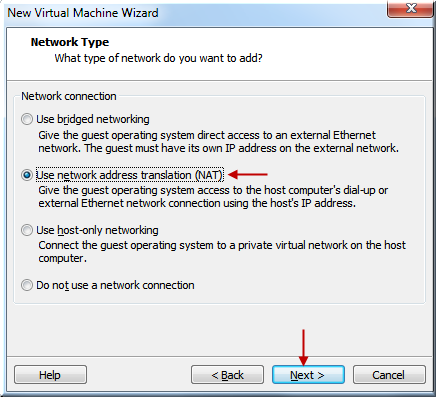
Select NAT. Click Next.
Click Next.
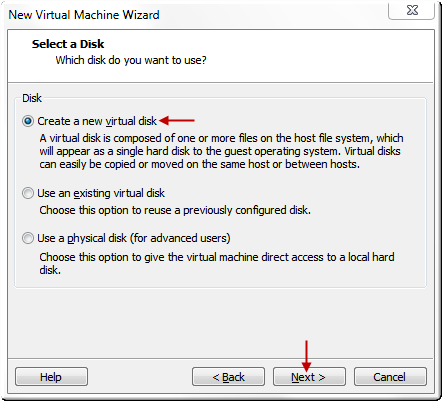
Select Create a New Virtual Disk. Click Next.
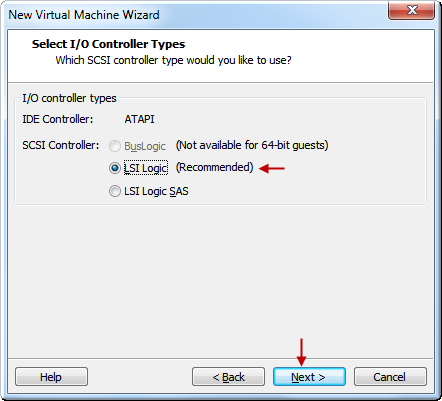
Click Next.
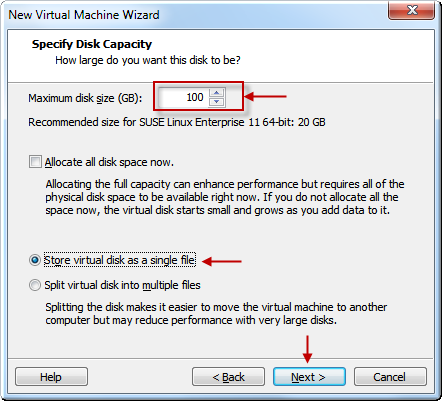
Select disk size 100 GB and select a single file. Click Next.
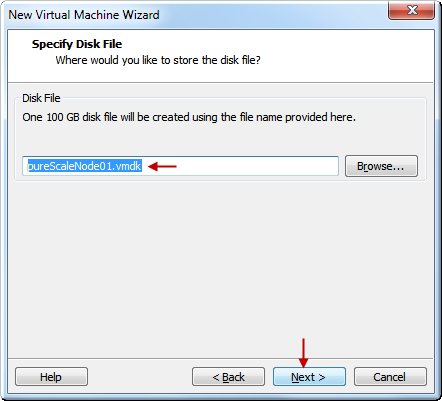
Click Next.
Click Finish.
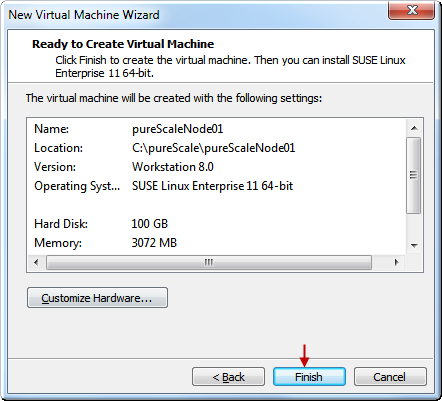
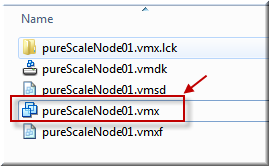
The end result of this exercise is the pureScaleNode01.vmx file. We have not yet installed the operating system. We will make some changes to this VMX file later to change the ethernet driver and force it not to change the UUID of the network driver when it is copied to some other directory.
Install SLES 11 SP1 in pureScaleNode01
Click CD/DVD. Click Use ISO Image and select SLES 11 SP1 DVD ISO that you had downloaded. [Note: You could use RedHat also but make sure that you are using the supported version. No Fedora or Open-SuSe please].

Power on the Virtual Machine to start the installation of the SLES 11 SP1.
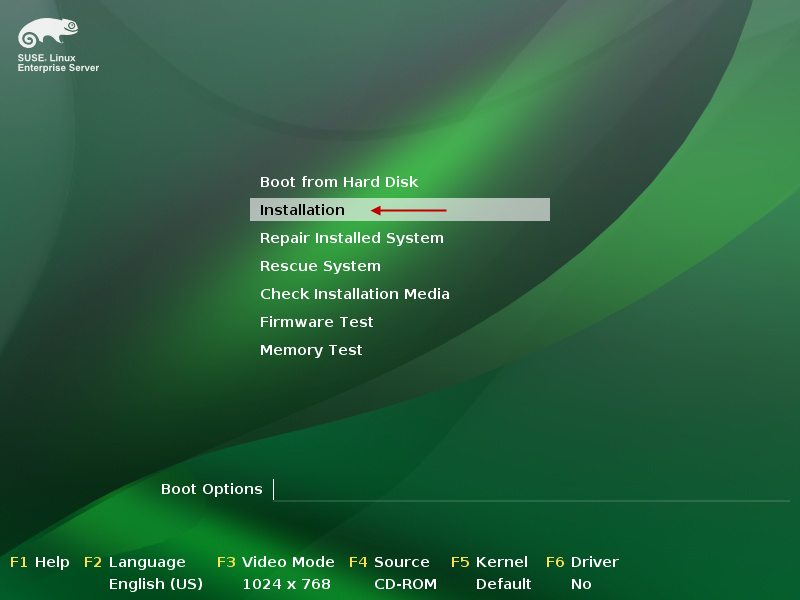
Select Installation and hit Enter.
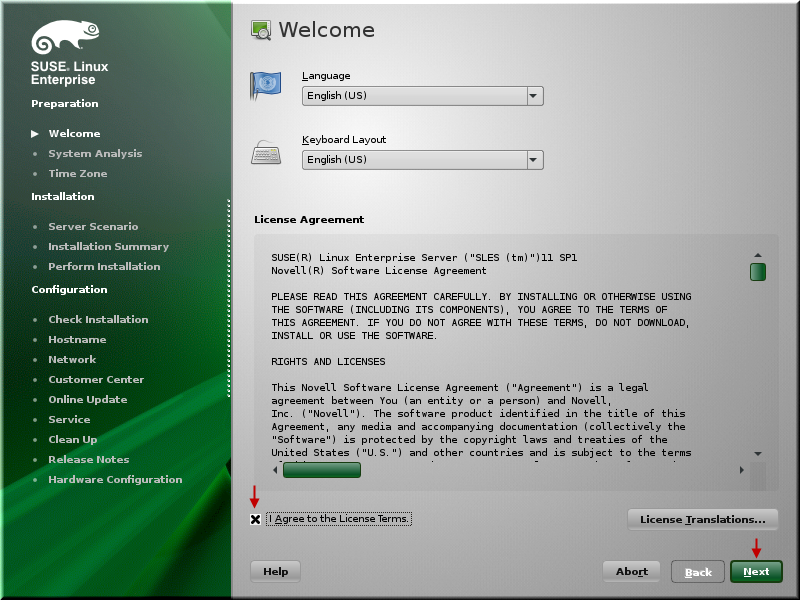
Click to agree license and click Next.
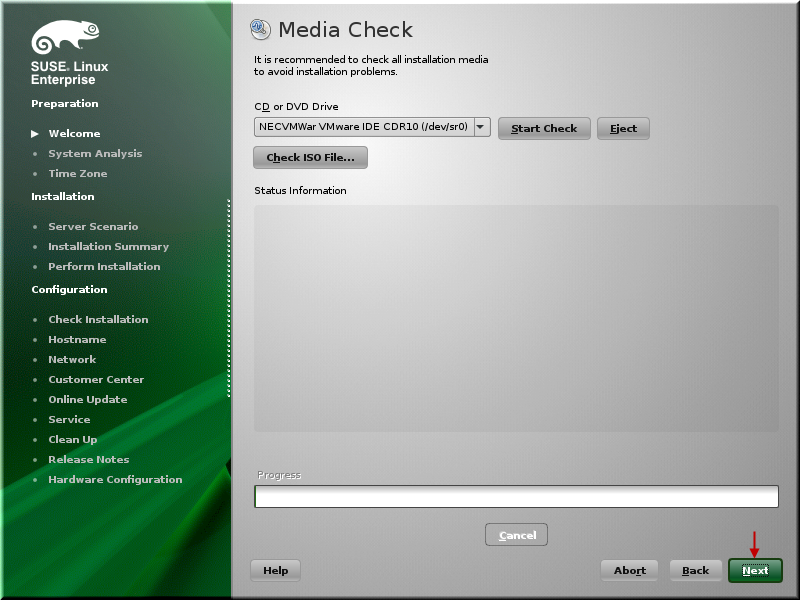
Click Next.
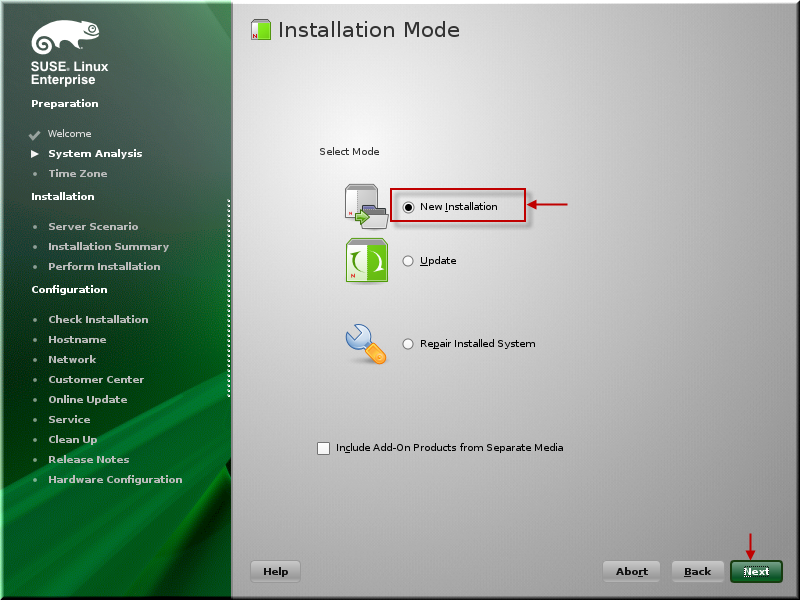
For New Installation, click Next.
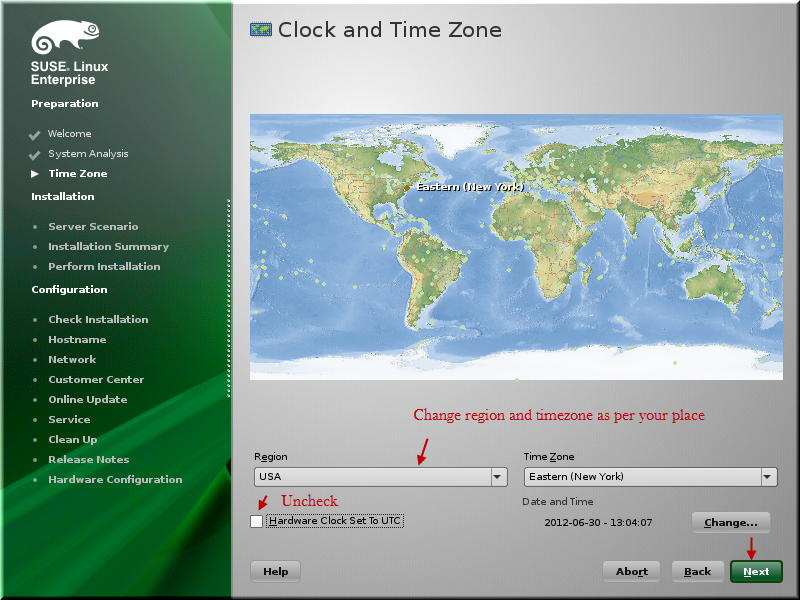
Change Region and Time Zone as per your location. Click Next.
Click Next.
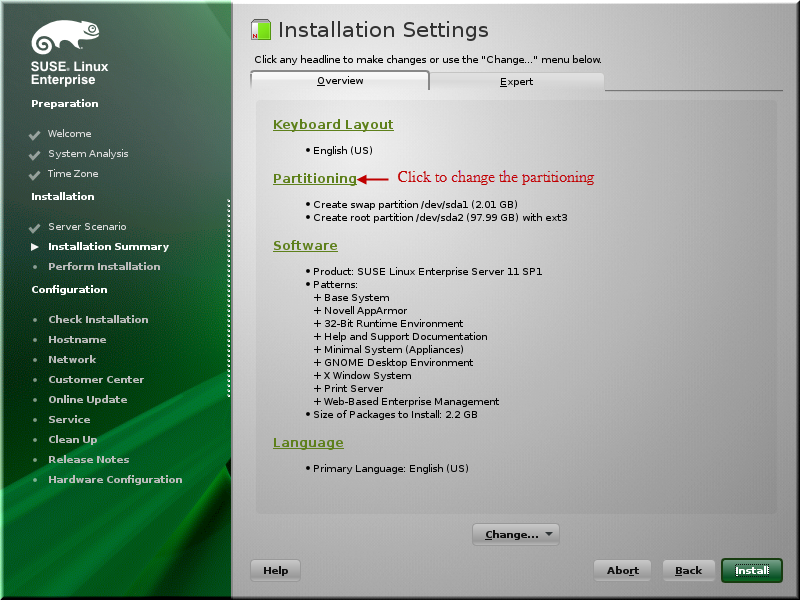
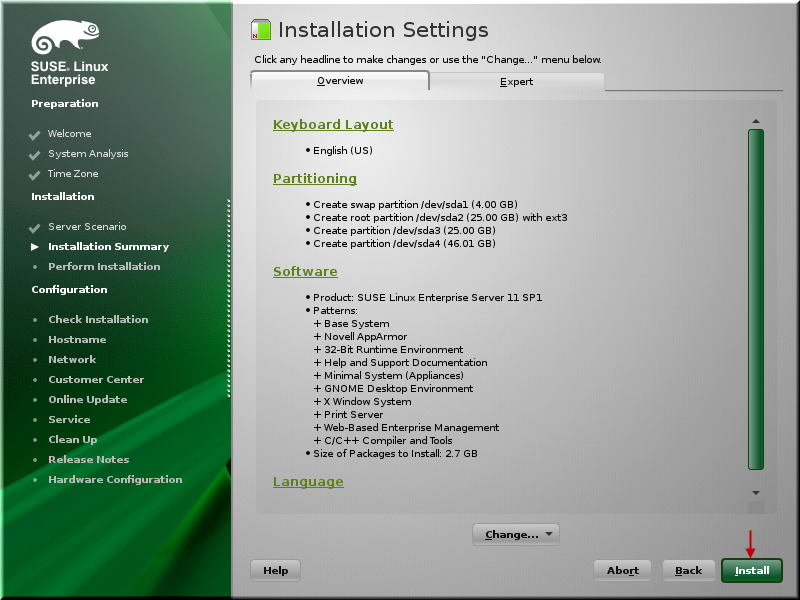
We will change Partitioning and Software so do not hurry to click Install. Click Partitioning.
For Custom partitioning, click Next.
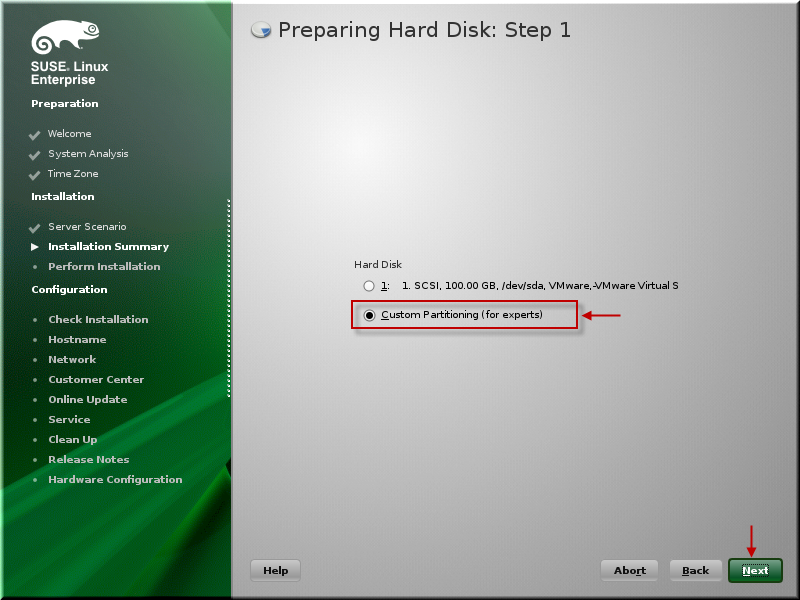
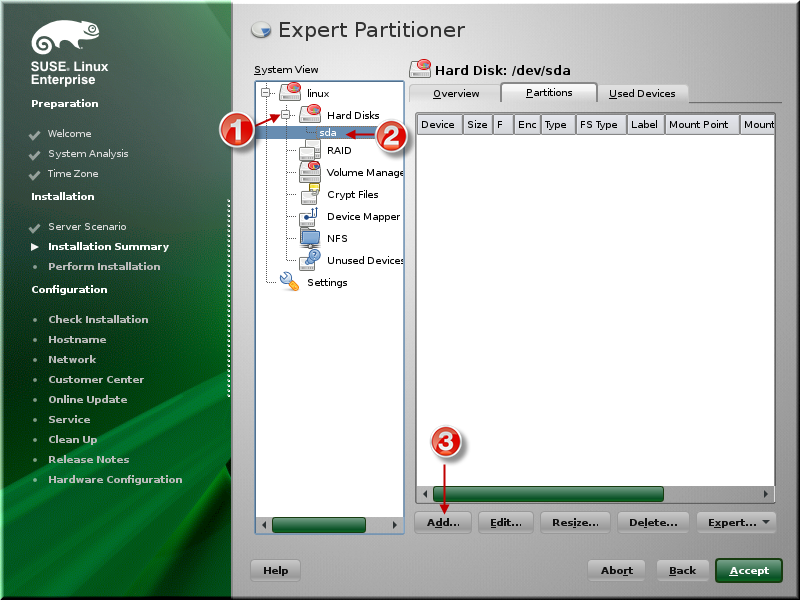
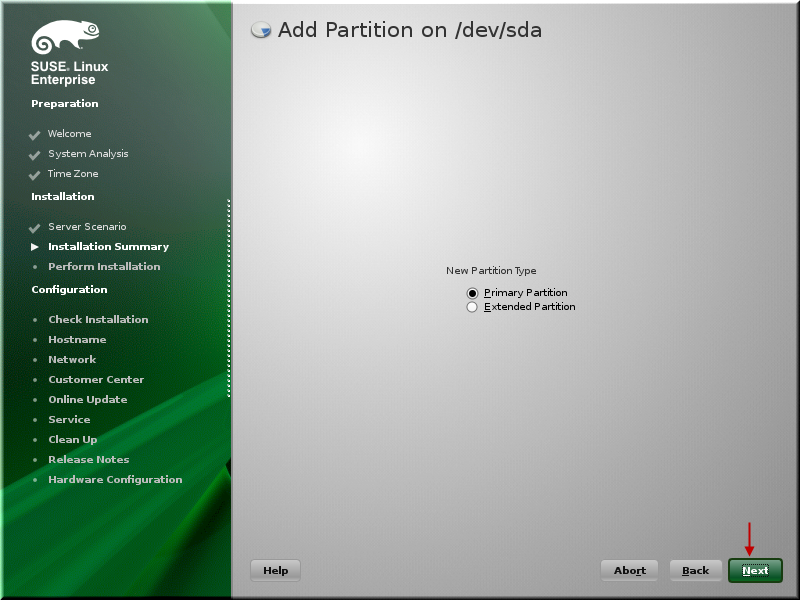
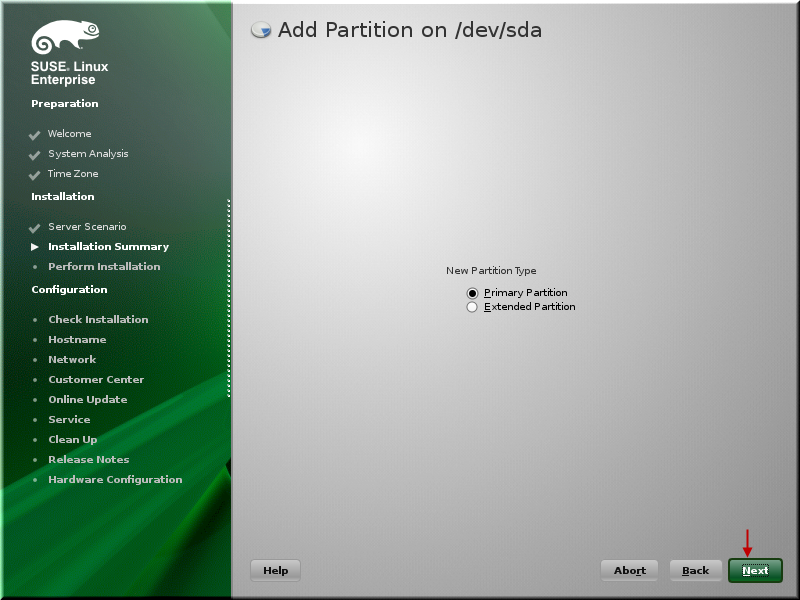
Expand Hard Disks and select sda and click Add to add a partition.
Click Next.
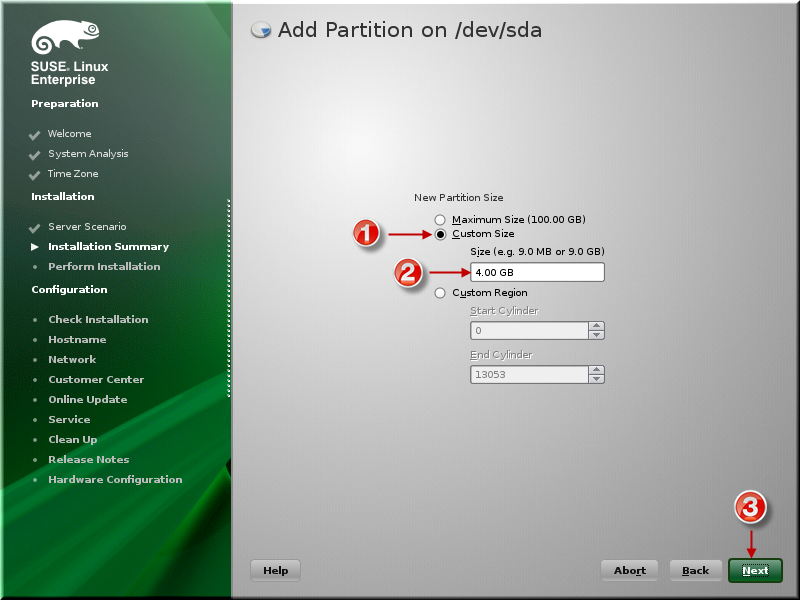
Select a size of 4GB and we will use this as a swap space. Click Next.
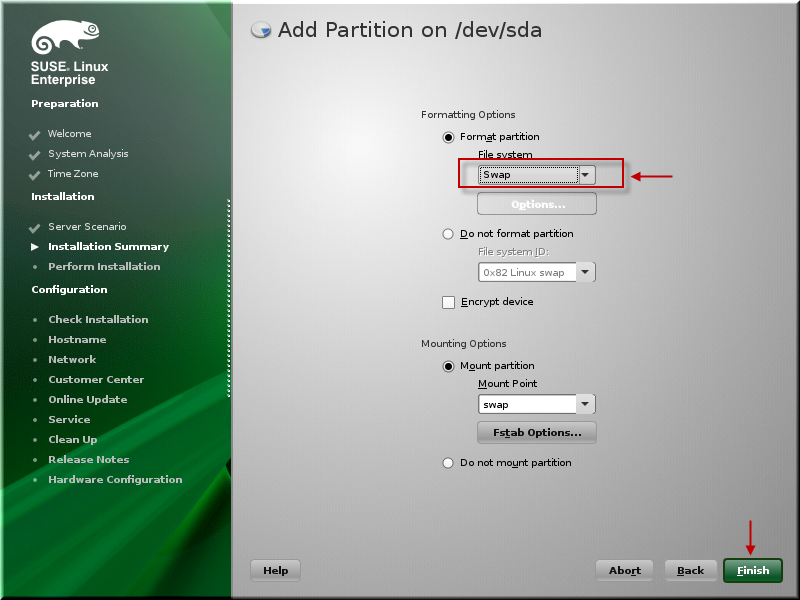
Select swap and click Finish.
Click Add again.
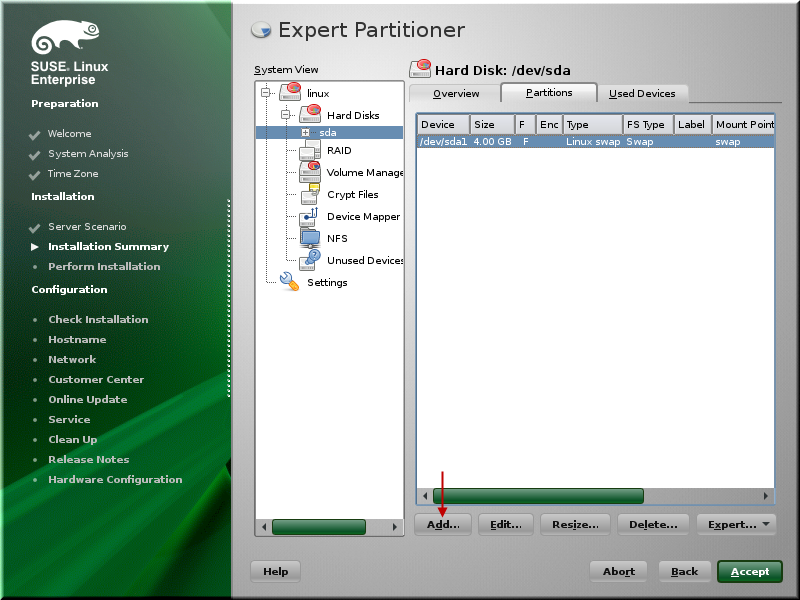
Click Next to create another primary partition.
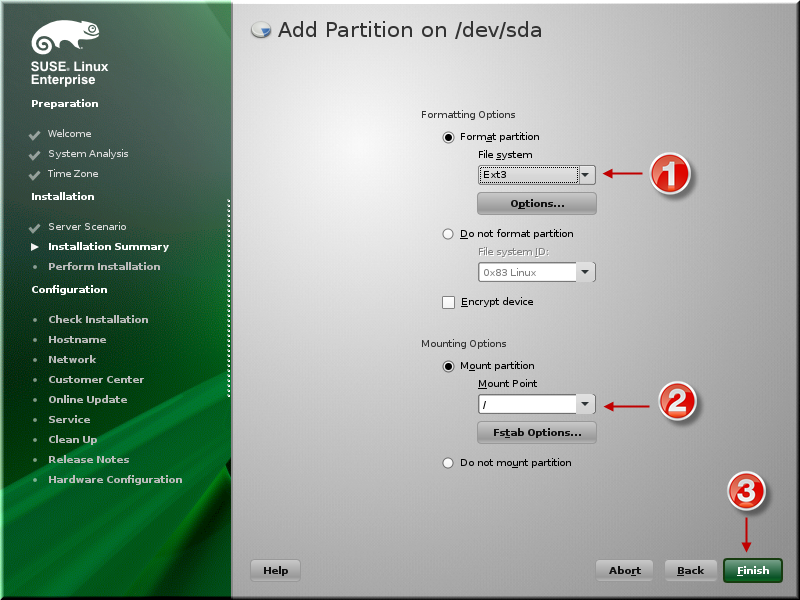
Change size to 25GB and click Next.

Select mount point as / with ext3 file system and then click Next.
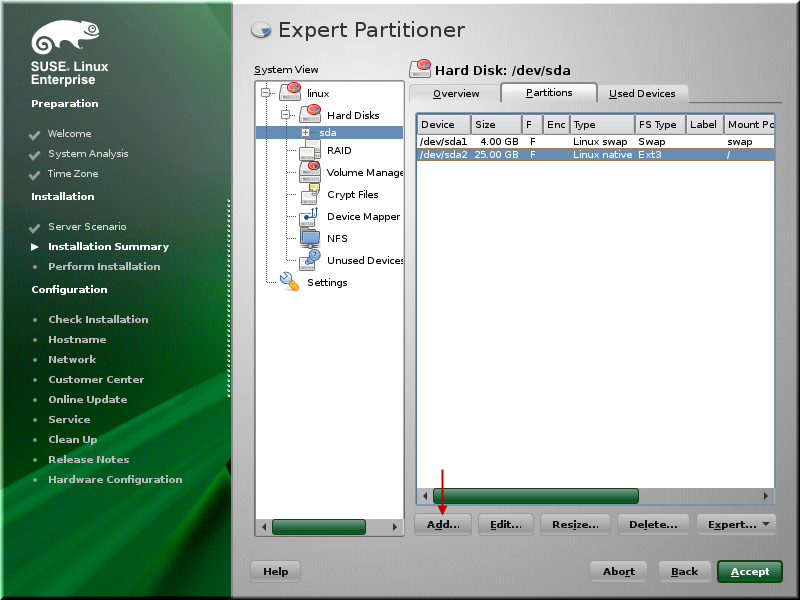
Click Add.
Click Next to use the Primary Partition.
Use 25 GB size. Click Next.
Select Do not format partition and Do not mount partition. Click Finish.
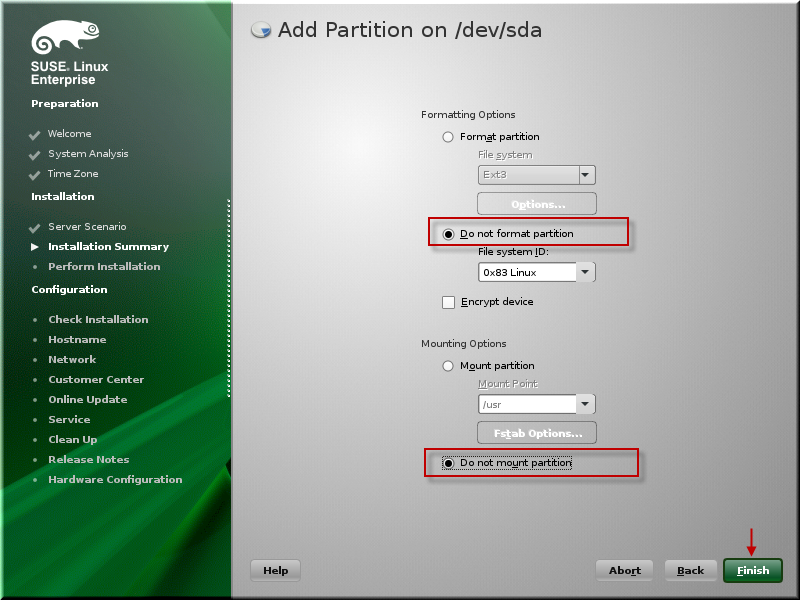
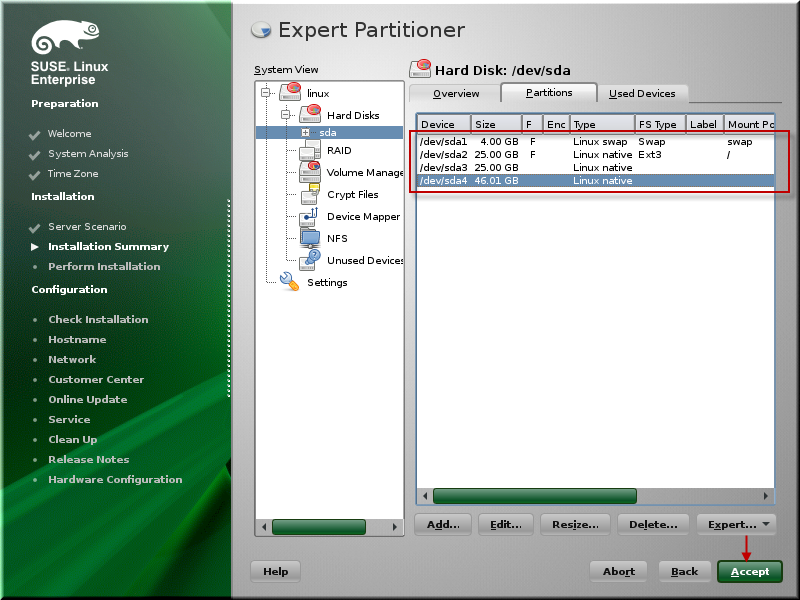
Click Add. Use remaning size. Click Next. Select Do not format partition and Do not mount partition. Click Finish. Your disk partition should look like as shown below.
Click Accept.
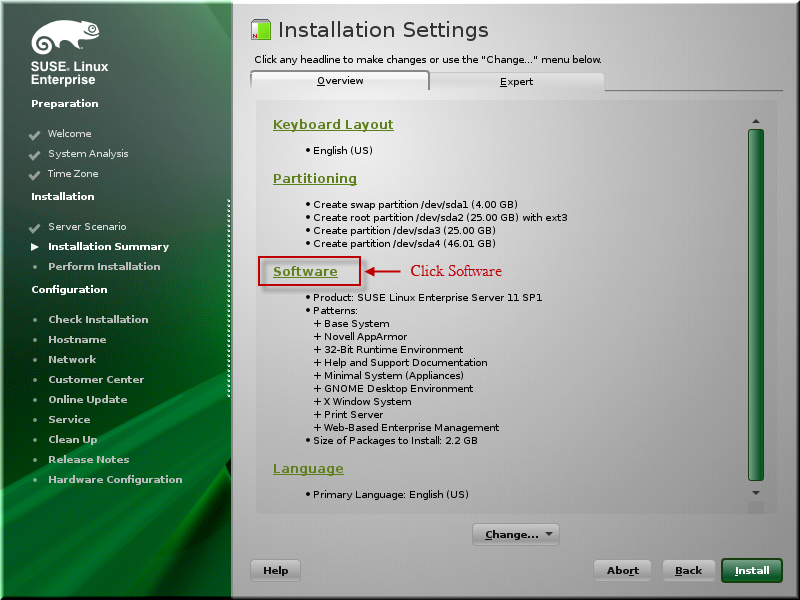
Click Software to add components that we need for DB2 pureScale.
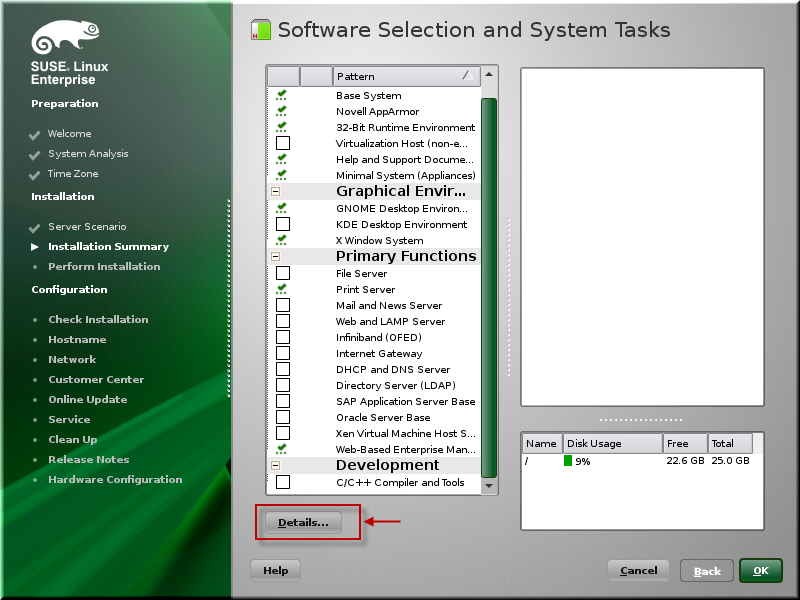
Click Details.
Select C/C++ Compiler and Tools and click Search.
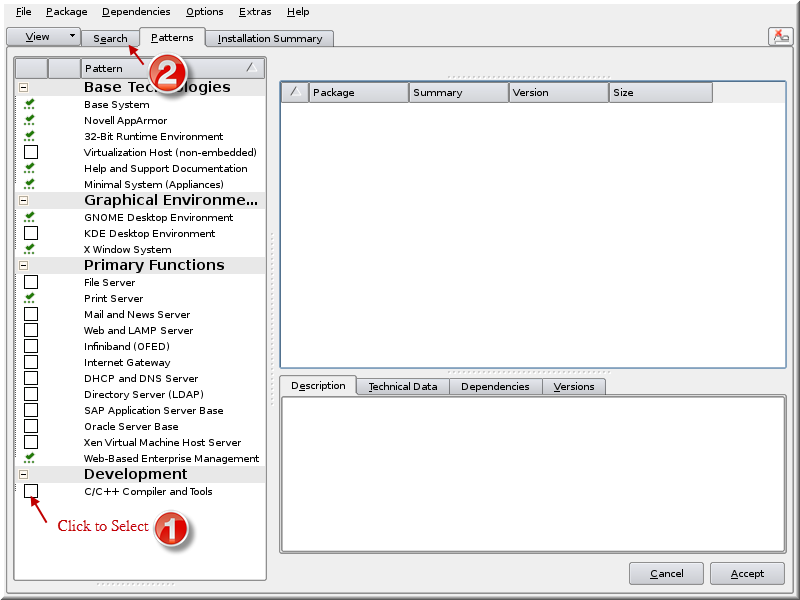
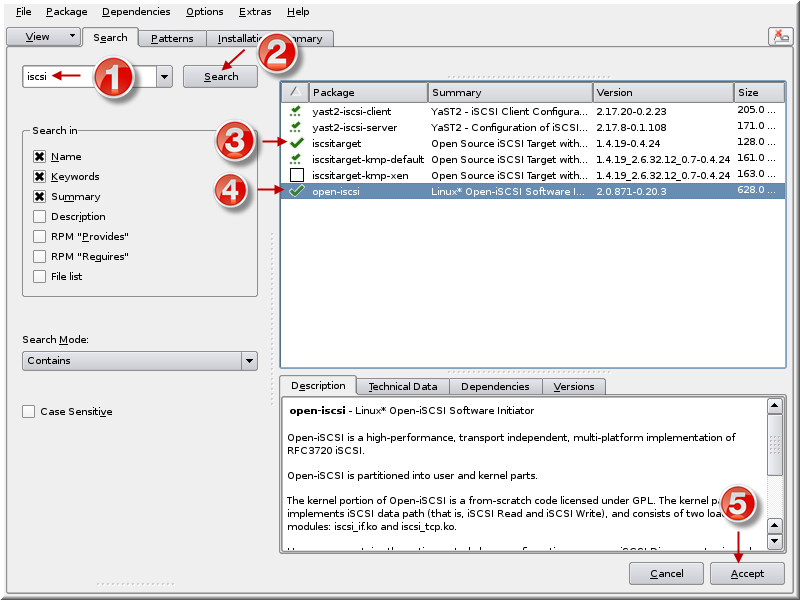
Search for iscsi. Select iscsitarget, iscsitarget-kmp-default and open-iscsi. Click Accept.
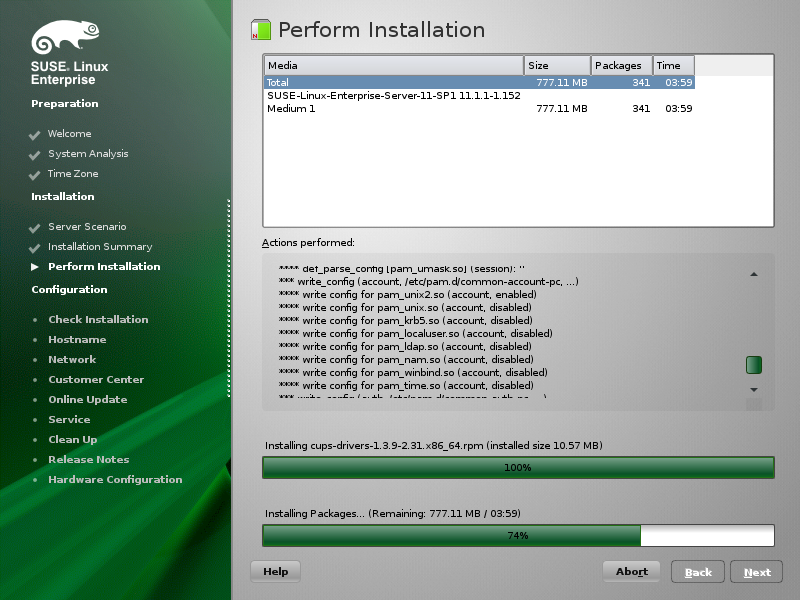
Click Accept and Continue. Click Install. Click Install again.
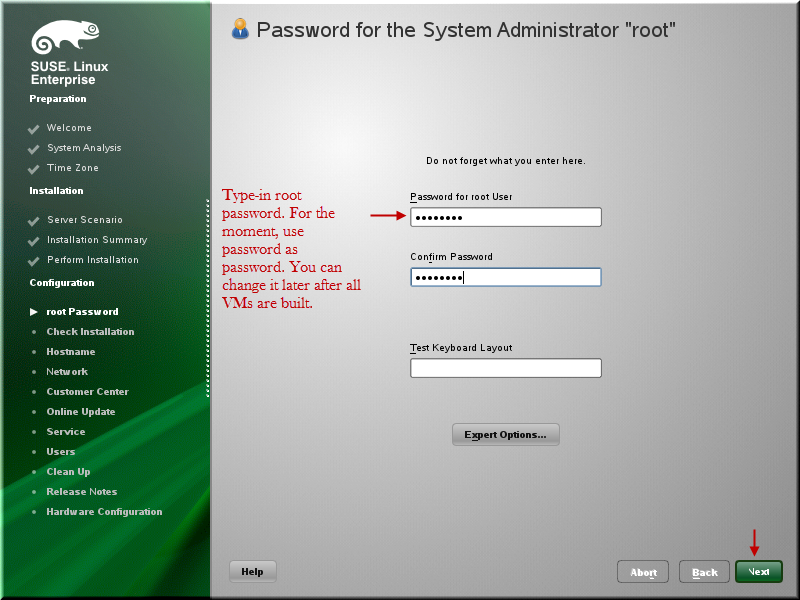
The OS installation begins and will take time. Let it complete and the next screen will ask for the root password.
Specify the root password. Click Next.
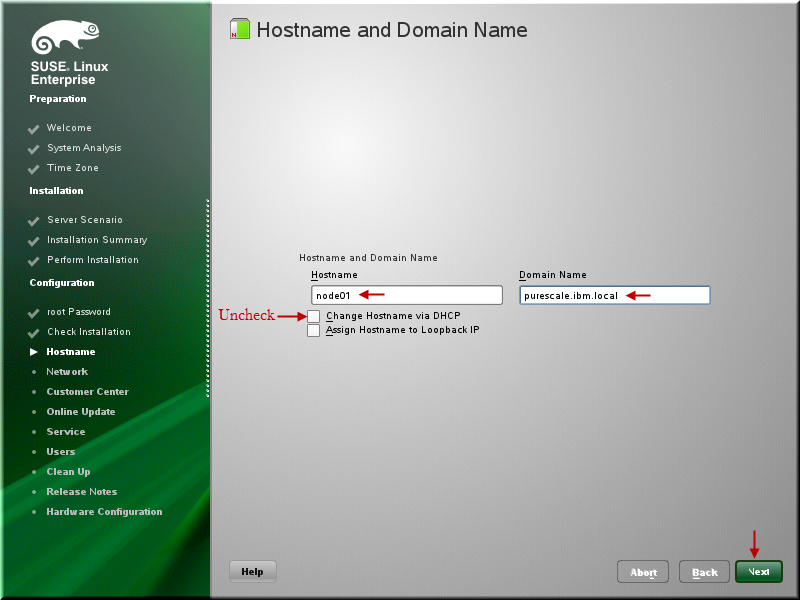
Type host name as node01 and domain name as purescale.ibm.local (for the time being) and you can change it later when you follow the process. Doing so will not force you to modify the scripts that you will use to build the machines.
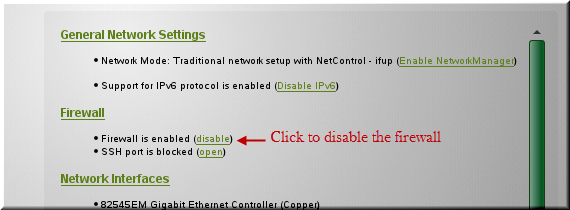
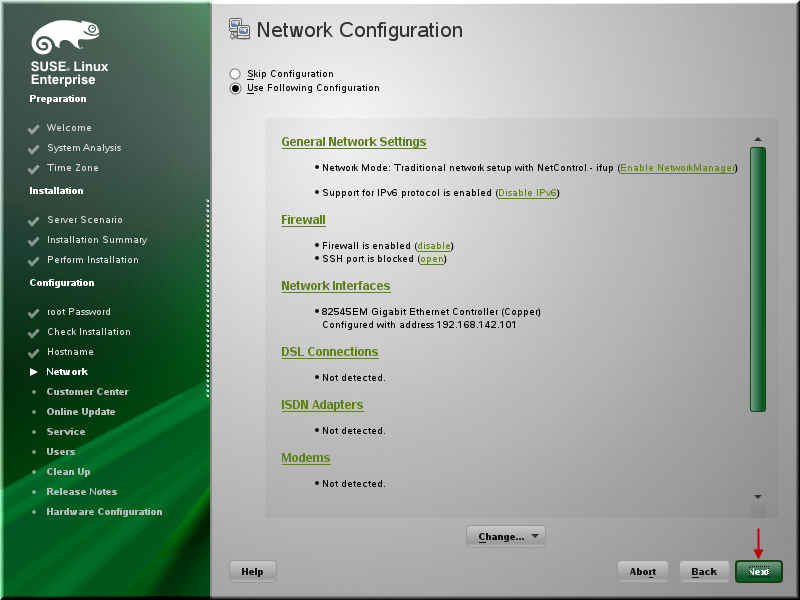
On the next screen, click to disable the Firewall.
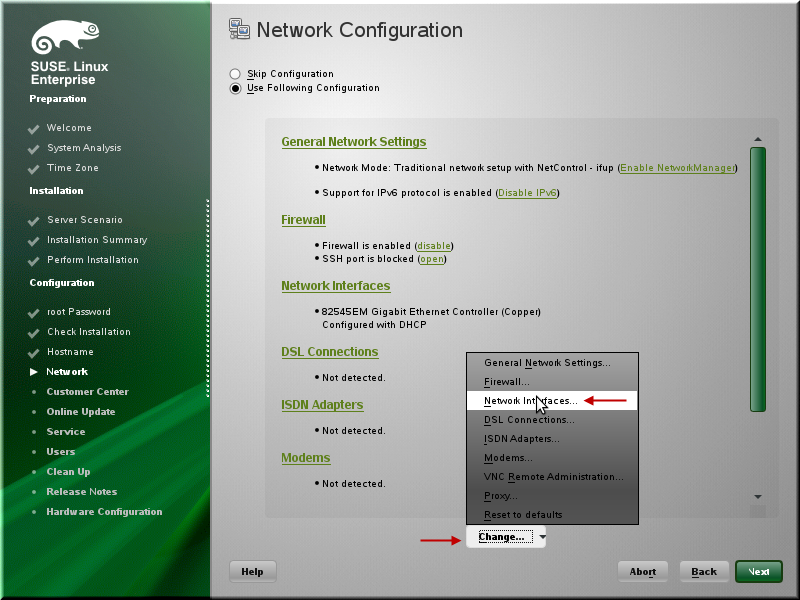
Click Change > Network Interfaces.
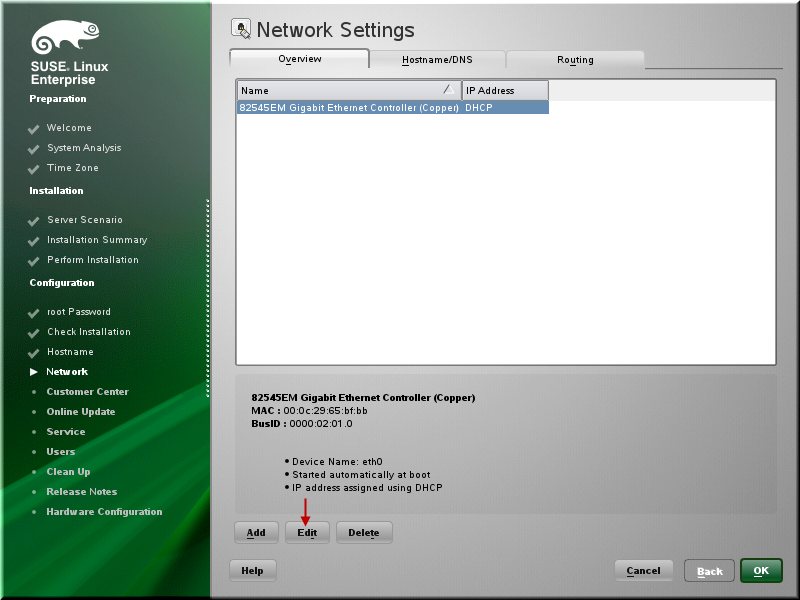
Click Edit.
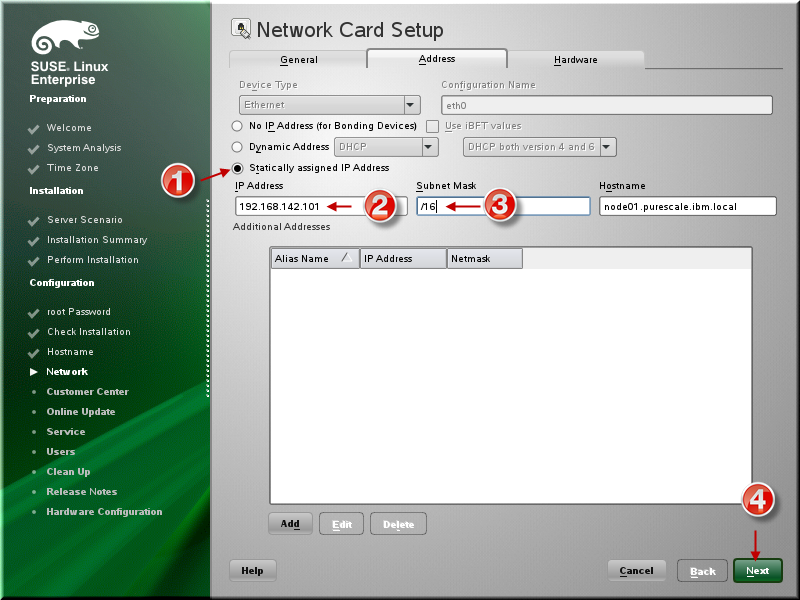
Select Static Address. Specify 192.168.142.101, /16 and click Next.
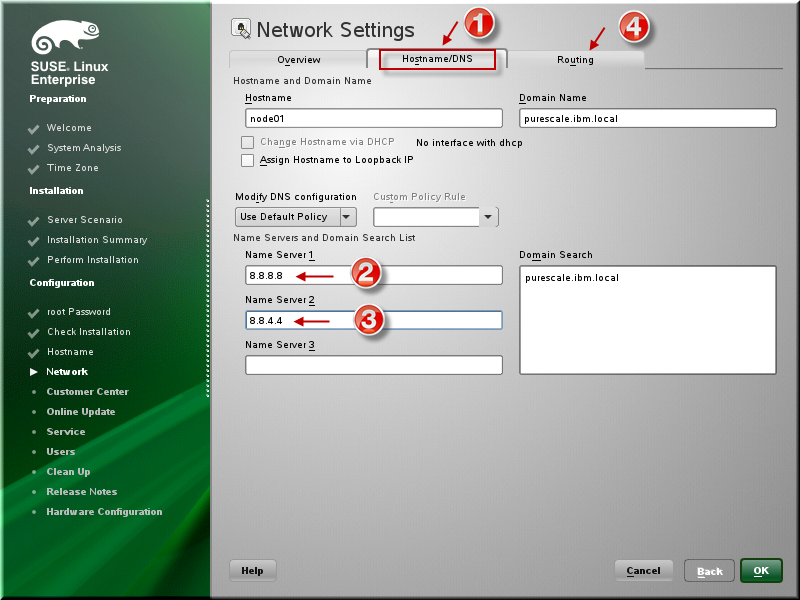
Specify DNS address as 8.8.8.8 and 8.8.4.4 (These are Google DNS but you can use your own preferred DNS address.) Click Routing tab.
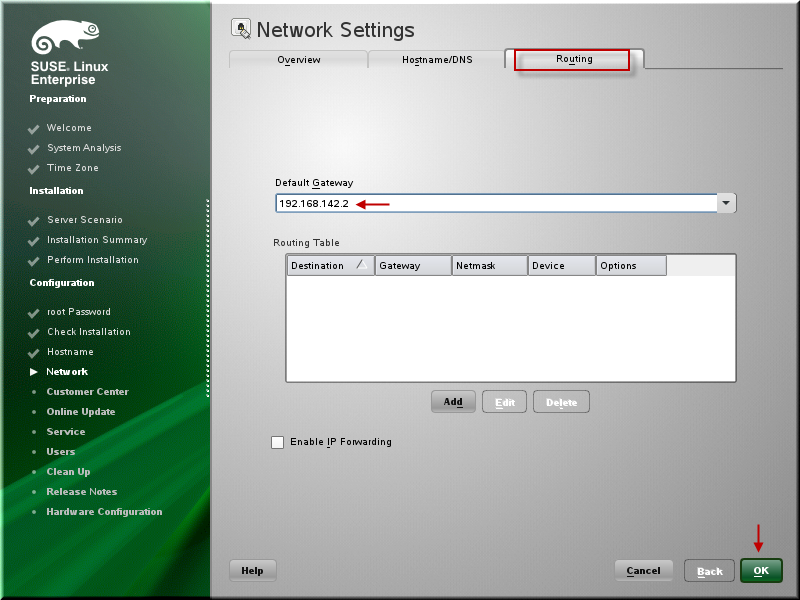
Specify Gateway as 192.168.142.2 and click OK.
Click Next.
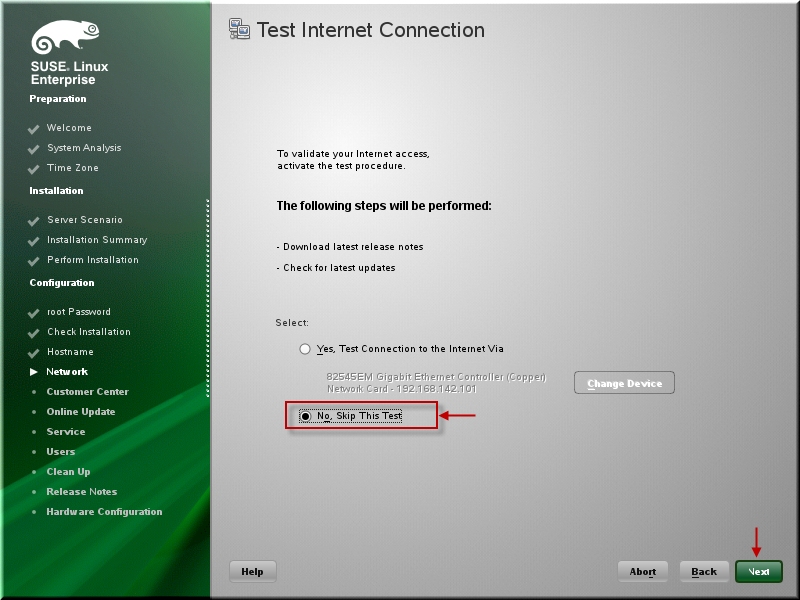
Skip Internet Test connection and click Next.
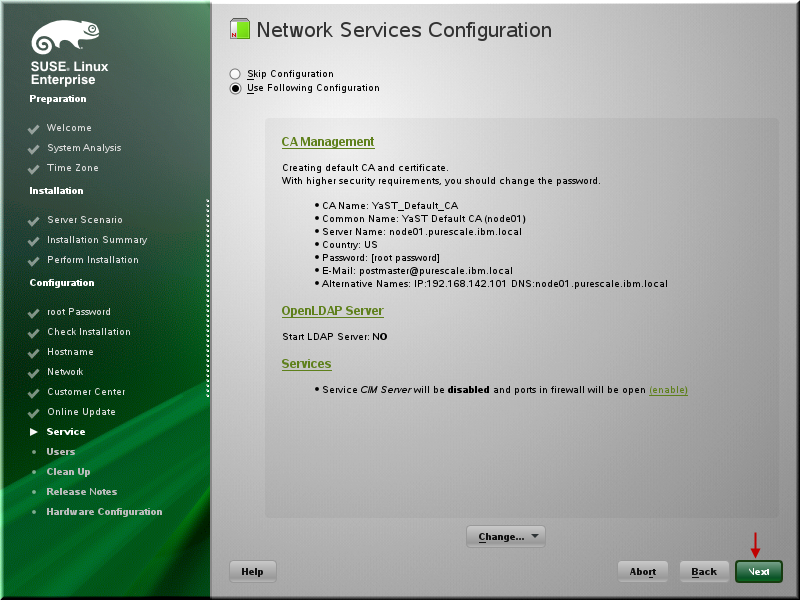
Click Next.
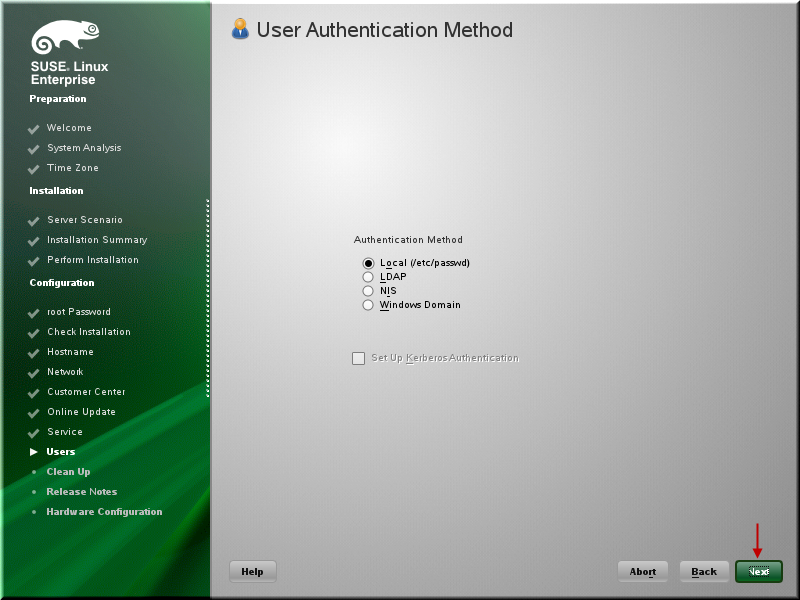
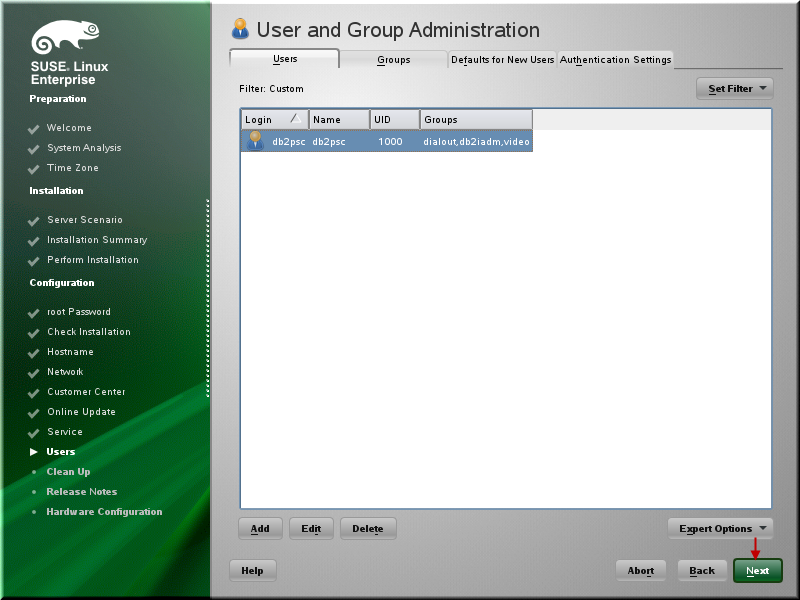
Click Next for the Users.
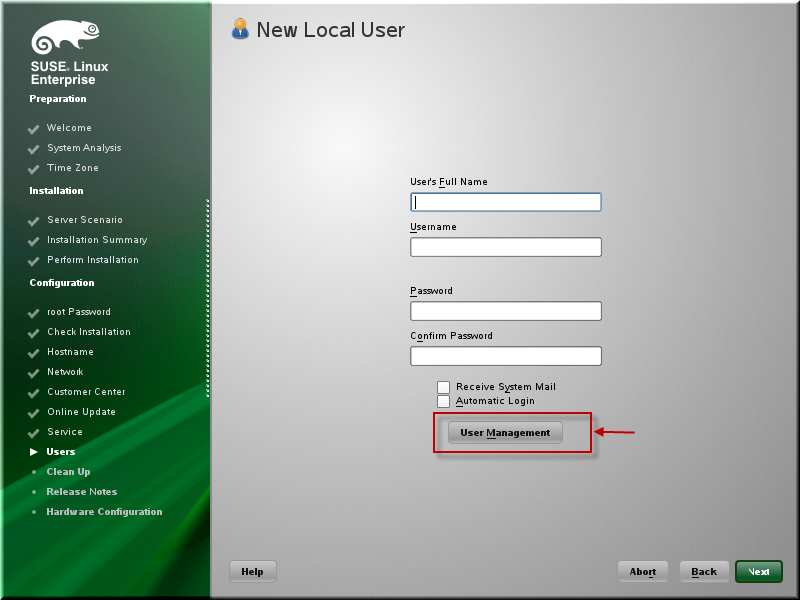
Click User Management.
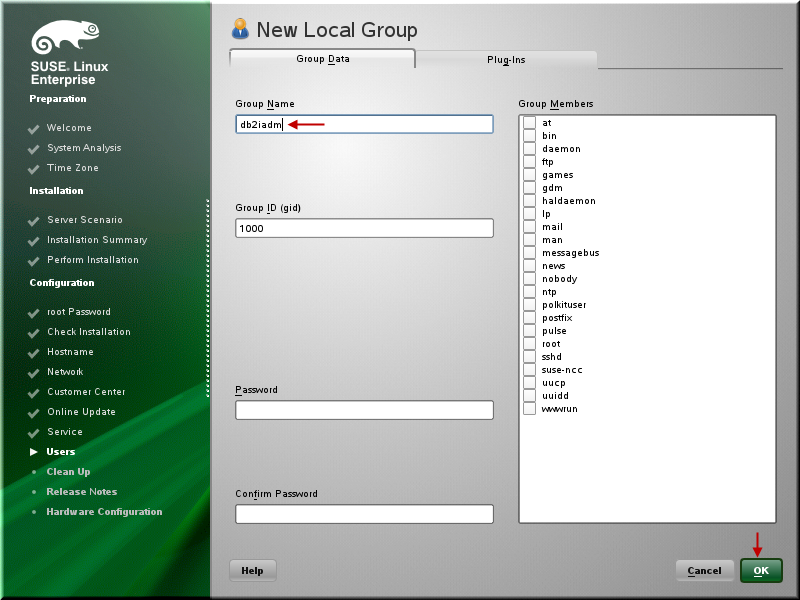
Click Groups tab and click Add.
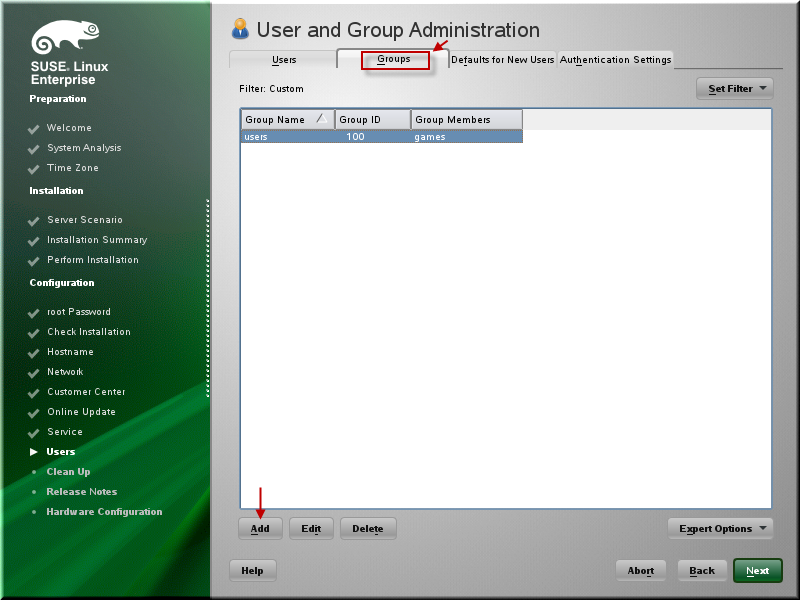
Specify db2iadm group name and click OK.
Click Users tab and click Add.
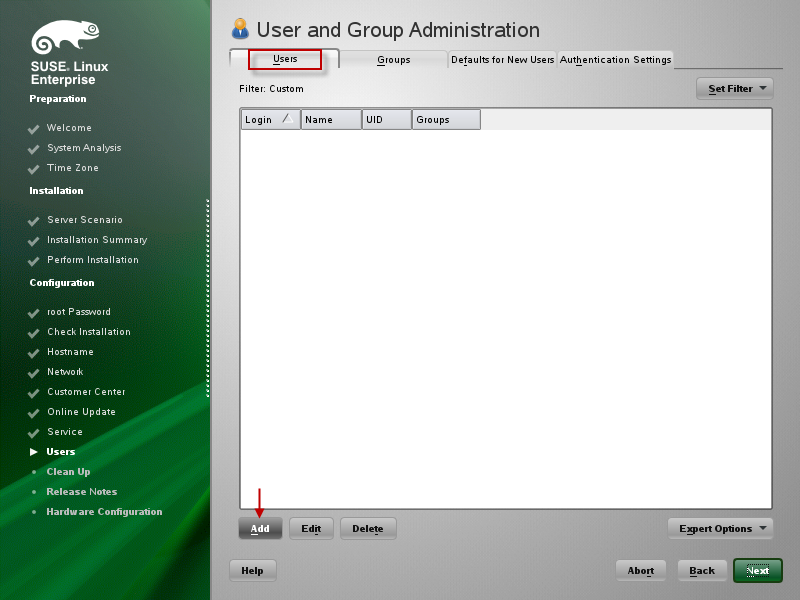
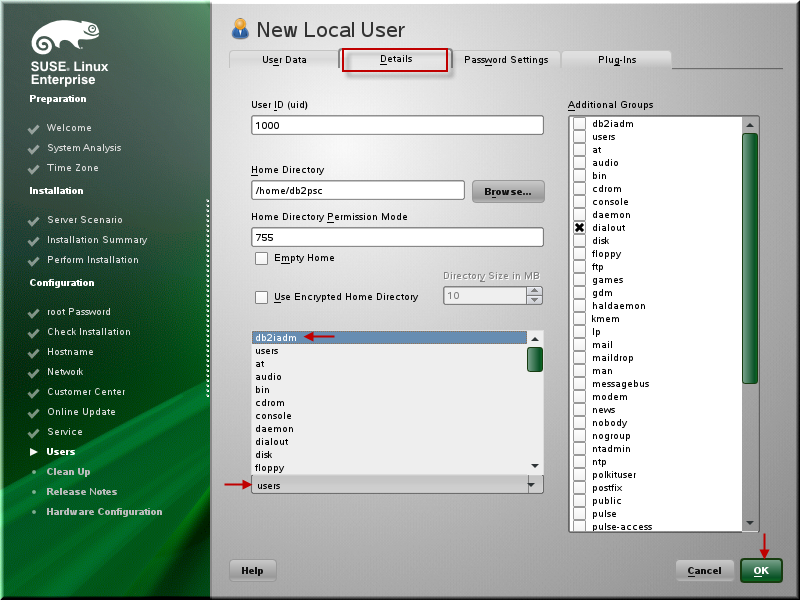
Specify the user name that you will use the DB2 instance owner. For example, we used the name as db2psc. Click Details. Click Yes for password to be simple.

Click users and select db2iadm. Click OK.
Click Next.
Click Next and it will probe for the Graphics. Click Next.
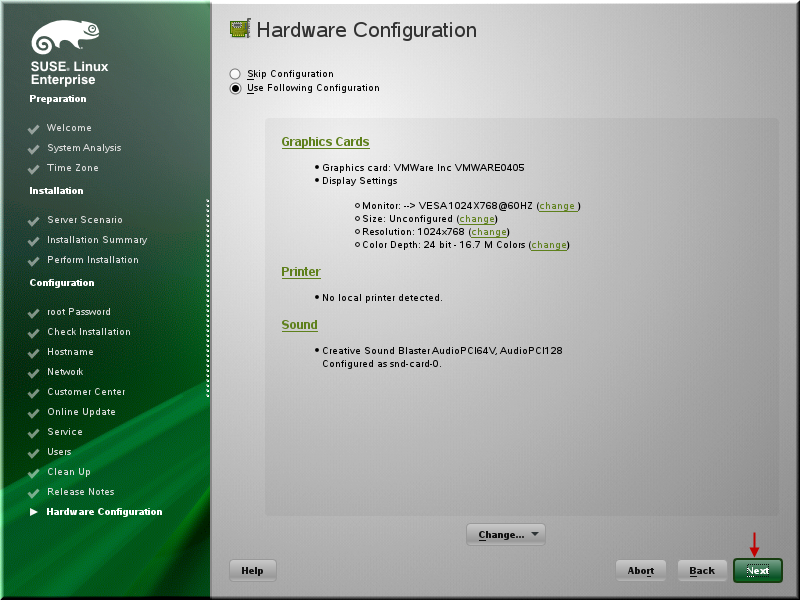
Click Finish.

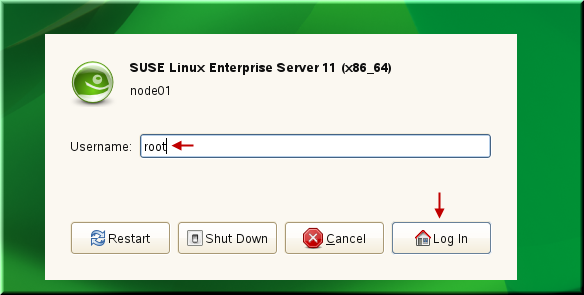
The VM will reboot and specify user name root and hit Enter. Specify password and click Log In.
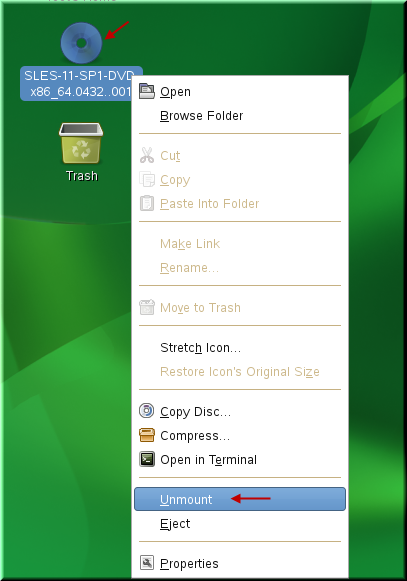
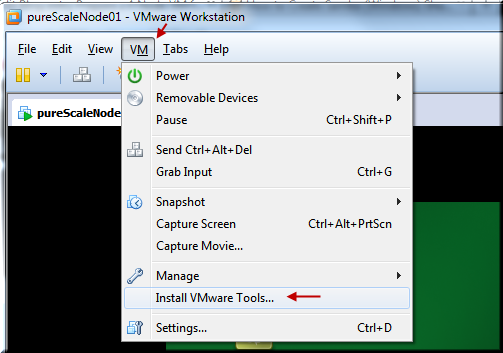
Install VMware Tools
Right click on the DVD icon and click Unmount.
Click VM > Install VMware Tools.
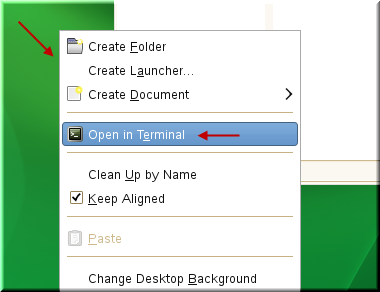
Right click anywhere on the desktop and click Open in Terminal.
Change directory to /tmp and untar the VMwareTools archieve.
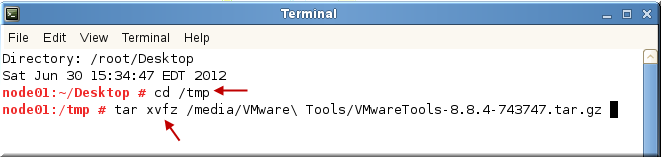
Change the directory to the vmware-tools-distrib and run vmware-install.pl to install the VMware tools.

Follow instructions and in all cases just follow the default values by pressing Enter and install the VMware tools.
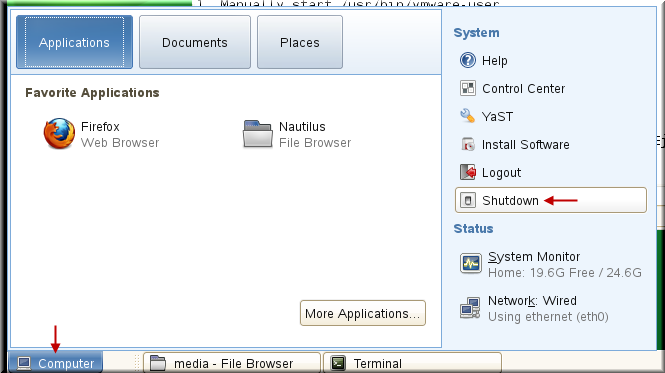
Click Computer > Shutdown. Click Shutdown again and specify root password when prompted.
Close VMware Workstation.
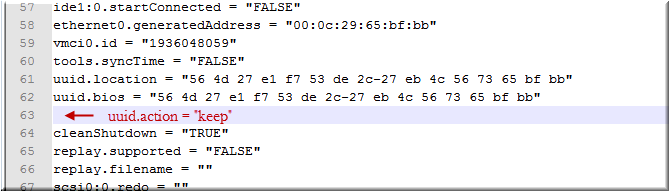
Go to your C:\pureScale\pureScaleNode01 directory and open pureScaleNode01 in a notepad to make some changes.
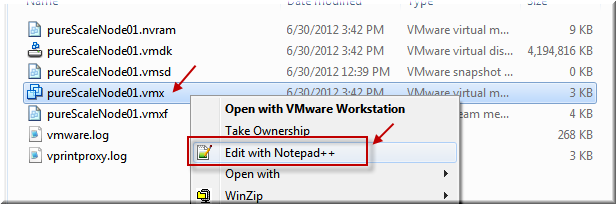
Add an entry uuid.action = "keep". Save and close the file.
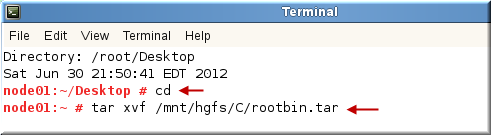
Download this tar rootbin.tar and copy to C:\
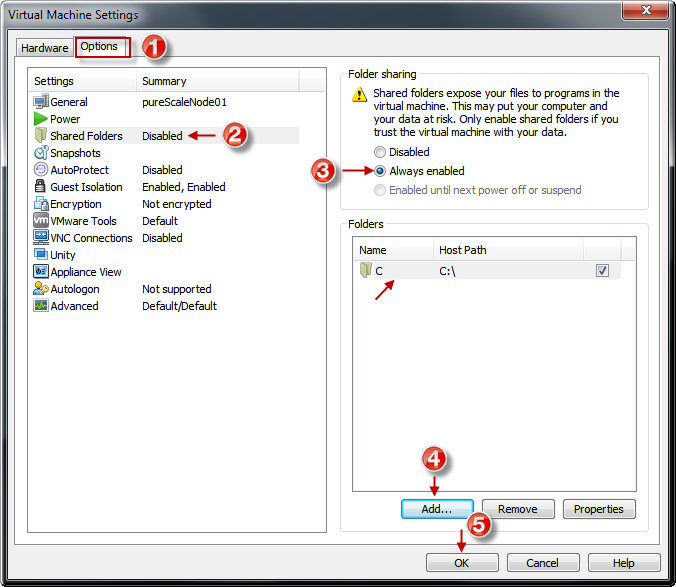
Double click pureScaleNode01.vmx to open VMware workstation. Click VM > Settings and go to the Options tab. Select Shared Folders. Click Always Enabled to select. Click Add and add C:\ as C. Click OK.
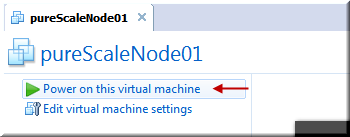
Power on pureScaleNode01. Log-in as root.
Right click on desktop and Open in Terminal to open a command shell.
Type cd to go to the home directory.
Type tar xvf /mnt/hgfs/C/rootbin.tar to untar the contents of the rootbin.tar.
Shutdown pureScaleNode01 VM
Clone VM Images
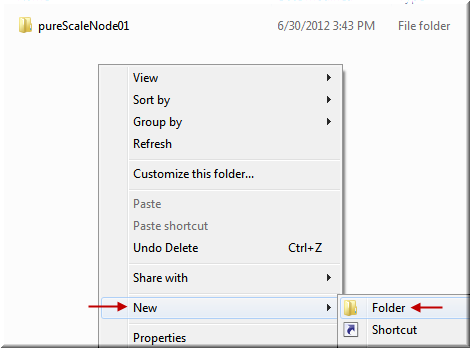
Go to C:\pureScale directory and create 3 additional directories by the name pureScaleNode02, pureScaleNode03 and pureScaleNode04.
Go to the C:\pureScale\pureScaleNode01 directory and hold shift key and select pureScaleNode01.vmx and pureScaleNode01.vmdk. Right click and click Copy.
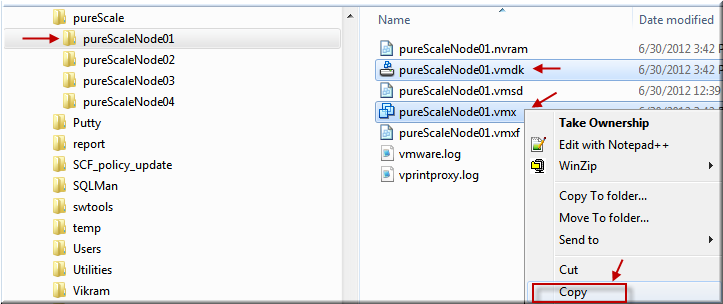
Go to the pureScaleNode02 directory and copy these two files. Repeat same for pureScaleNode03 and pureScaleNode04. By doing so, we are going to clone one VM image to 3 other VM images.
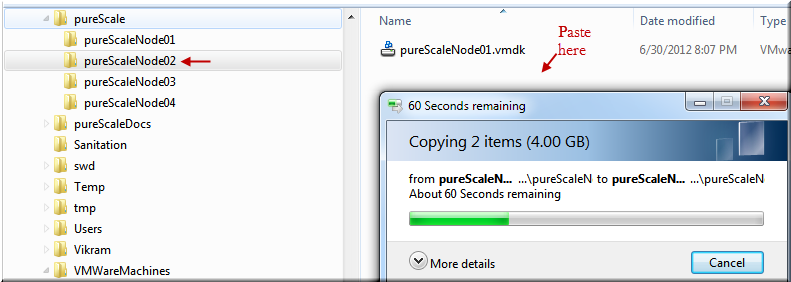
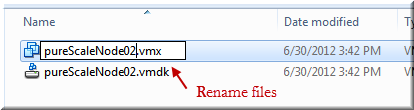
After copy is done, go to the pureScaleNode02 and rename pureScaleNode01.vmx to pureScaleNode02.vmx and rename pureScaleNode01.vmdk to pureScaleNode02.vmdk.
Repeat same for pureScaleNode03 and pureScaleNode04.
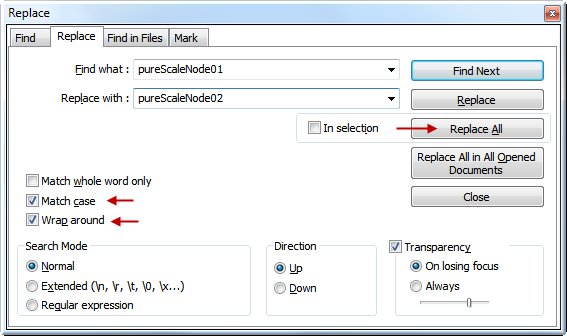
Open pureScaleNode02.vmx in an editor such as Notepad++ or Notepad.
Replace each occurance of pureScaleNode01 to pureScaleNode02. Save and close the pureScaleNode02.vmx.
Repeat same for pureScaleNode03.vmx and replace each occurance of pureScaleNode01 to pureScaleNode03. Save and close the pureScaleNode03.vmx.
Repeat same for pureScaleNode04.vmx and replace each occurance of pureScaleNode01 to pureScaleNode04. Save and close the pureScaleNode04.vmx.
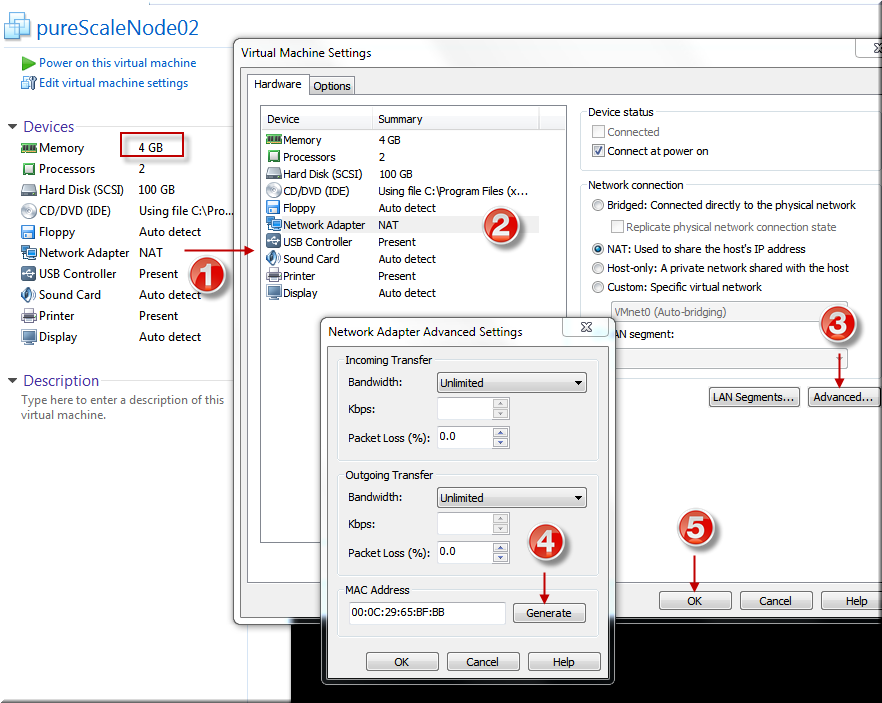
Double click pureScaleNode02.vmx to open the VMware workstation. Click Memory and change it from 3GB to 4GB. Click Network Adapter. Click Advanced. Click Generate. Click OK twice.
Close VMware workstation.
Double click pureScaleNode03.vmx and change memory from 3 GB to 4 GB. Repeat above exercise to generate a new MAC address for the Network Adapter. Close VMWare Workstation.
Double click pureScaleNode04.vmx and repeat above exercise to generate a new MAC address for the Network Adapter. Close VMWare Workstation.
Double click pureScaleNode01.vmx. Power on pureScaleNode01. Log-in as root.
Right click on desktop and select Open in Terminal to open a command shell.
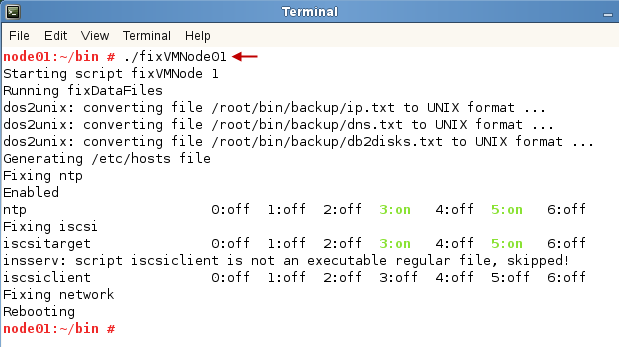
Type cd /root/bin to go to the root's bin directory.
Run command ./fixVMNode01 to fix this pureScaleNode01. After making changes, the VM will reboot.
Wait for the VM to reboot.
Double click pureScaleNode02.vmx to open the VM. Power on it. Log-in as root.
Right click on desktop and select Open in Terminal to open a command shell.
Type cd /root/bin to go to the root's bin directory.
Run command ./fixVMNode02 to fix the pureScaleNode02. After making changes, the VM will reboot. Please wait for this to reboot and login as root.
Double click pureScaleNode03.vmx to open the VM. Power on it. Log-in as root.
Right click on desktop and select Open in Terminal to open a command shell.
Type cd /root/bin to go to the root's bin directory.
Run command ./fixVMNode03 to fix this pureScaleNode03. After making changes, the VM will reboot. Please wait for this to reboot and login as root.
Double click pureScaleNode04.vmx to open the VM. Power on it. Log-in as root.
Right click on desktop and select Open in Terminal to open a command shell.
Type cd /root/bin to go to the root's bin directory.
Run command ./fixVMNode04 to fix this pureScaleNode04. After making changes, the VM will reboot and wait for this to reboot. Login as root.
If you get the low memory warning from the VM, click Do Nothing and try again to start it.
We are using 3 GB for node01 and node04 and 4 GB each for node02 and node04.
Please Note: We are consuming 14GB out of 16GB. Windows has only 2 GB left so please do not run any resource intensive programs while you are running 4 VM on your laptop.
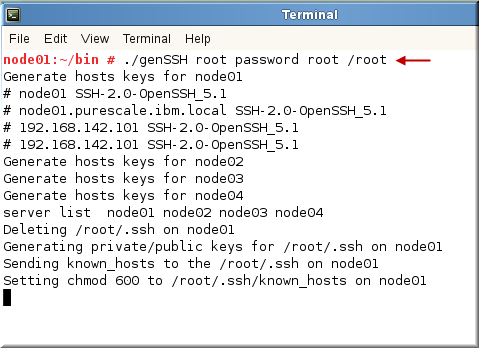
Go to the command window shell of the pureScaleNode01.
From the /root/bin directory, type following command to set up passwordless ssh for root for all nodes. This is required for the DB2 10.1 pureScale installation.
# cd /root/bin
# ./genSSH root password root /root
Replace password with your root password that you used during the OS installation.
If genSSH fails, it is most likely that either vnet8 network address is not set to 192.168.142.0 or the firewall is enabled.
Run these commands on each node if genSSH failed due to the firewall issue.
# service SuSEfirewall2_init stop
# service SuSEfirewall2_setup stop
# chkconfig -d SuSEfirewall2_setup
# chkconfig -d SuSEfirewall2_init
# chkconfig –list | grep firewall
SuSEfirewall2_init 0:off 1:off 2:off 3:off 4:off 5:off 6:off
SuSEfirewall2_setup 0:off 1:off 2:off 3:off 4:off 5:off 6:off
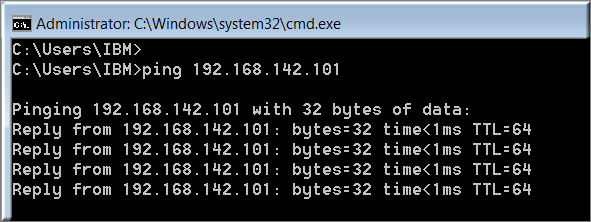
Sanity Check for VM
Open a Windows Command shell from your Windows host. Ping IP addresses of each VMware machines 192.168.142.101, 192.168.142.102, 192.168.142.103 and 192.168.142.104. The ping should succeed.
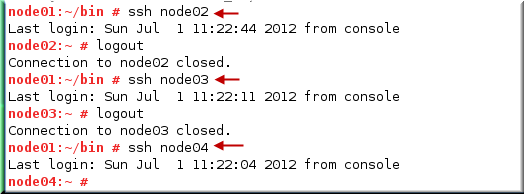
Go to pureScaleNode01 VM and from the command terminal, test ssh node02, ssh node03 and ssh node04 commands. If they work fine, the setup is OK.
After passwordless ssh is configured, restart iscsiclient service on pureScaleNode02, pureScaleNode03 and pureScaleNode04. When you reboot your machines later on, this will not be necessary.
Run these commands from pureScaleNode01
# ssh node02 service iscsiclient restart
# ssh node03 service iscsiclient restart
# ssh node04 service iscsiclient restart
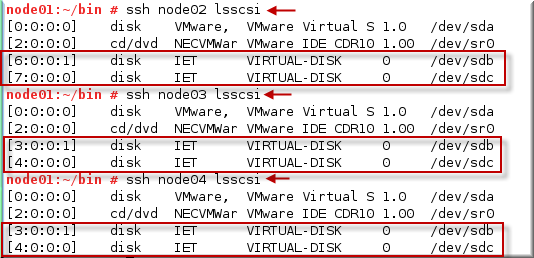
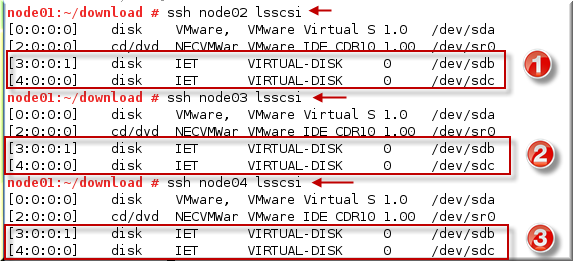
Once iscsiclient is restarted on all nodes, try these commands to see that /dev/sdb and /dev/sdc are visible to node02, node03 and node04. By doing so, we implemented a poor man SAN on node01.
# ssh node02 lsscsi
# ssh node03 lsscsi
# ssh node04 lsscsi
Important Note: We are not using multipath and linux udev is known for renaming the disks. For example, the disks /dev/sdb and /dev/sdc could be renamed to anything such as /dev/sdd or /dev/sdh depending upon if you have USB drive attached to your laptop etc. It is also possible that these names are different on each node. So, you have to take care to make sure that these names are same accros all nodes. If this is not the case, you will have huge problems in starting the DB2 pureScale. Please understand that this is our testing and learning system so we should know the boundaries in which we are working. The best solution is to implement the multipath so that the device name is consistent. I have not yet tried that but will try in the next iteration.
Also, please notice that the LUN number is different on node02 than it is on node03 and node04 for virtual disks. The best thing here is to shutdown all machines and start them again. Remove any USB disks etc that you might have.
Shutdown procedure: Shut down node02, node03 and node04 and then shut down node01 since this is our SAN server.
Startup Procedure: Start first node01 and wait for this to start completely. You can then start node02, node03 and node04 in any order or simultaneously.
The SAN devices on all 3 nodes should be same as shown below:
Install DB2 10.1 pureScale
Before going to the DB2 10.1 install, please make sure that you checked / understand all of the following:
- You can do root ssh from any node to any node.
- The gatway address is set properly (i.e. 192.168.142.2) in our case and it can be pinged from all VMs. (Not necessary from the Windows Host as it does not see the VM Gateway address.)
- The /etc/hosts file is same across all nodes. Our script took care of it but this is important.
- Limitation-1: We are not using enterprise SAN system and instead we are using node01 as our SAN server so this will be slow.
- Limitation-2: There is no high speed interconnect so the communication between nodes is through regular ethernet and this will be slow.
- Limitation-3: We are using a single hard disk of the laptop which is shared by the 4 VM so this will be slow.
Locate your DB2 10.1 Try and Buy copy that you downloaded from IBM site given at the top and copy it to the C:\
Go to the pureScaleNode02 and enable shared folders. Click VM > Settings and go to the Options tab. Select Shared Folders. Click Always Enabled to select. Click Add and add C:\ as C. Click OK.
Right click on the desktop and click Open in Terminal. Type cd to go the root's home directory and create download directory.
# cd
# mkdir download
# cd download
# tar xvfz v10.1_linuxx64_server.tar.gz

After getting the contents of the DB2 installation, go to the server directory and run db2setup command.
# cd server
# ./db2setup

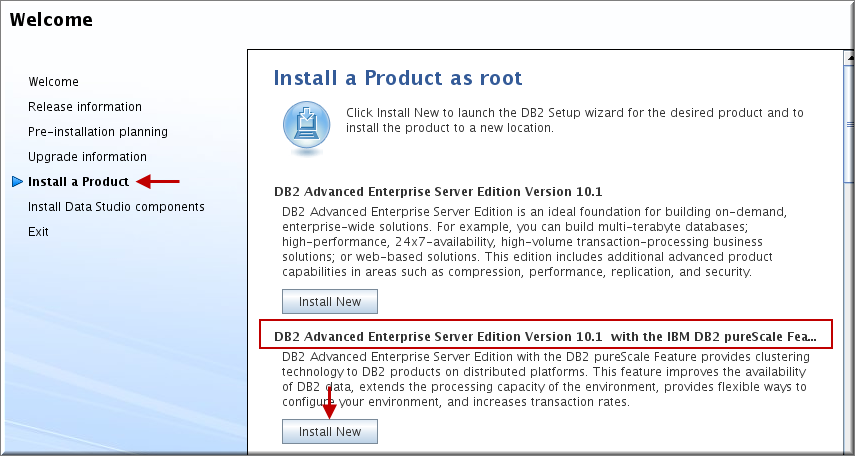
The DB2 install GUI will launch. Click Install a Product to select it. Click Install New on DB2 Advanced Server Edition Version 10.1 with the IBM DB2 pureScale Feature.
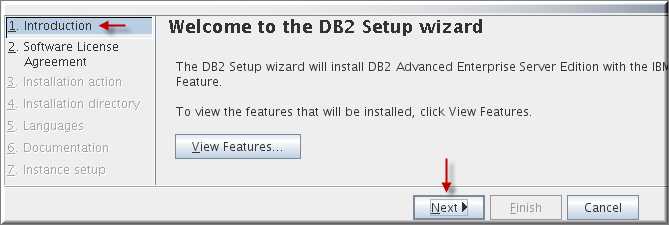
In the Introduction step, click Next.
Click Accept. Click Next in the Software License Agreement step.

Click Next in the Installation action step. Keep default settings as is.

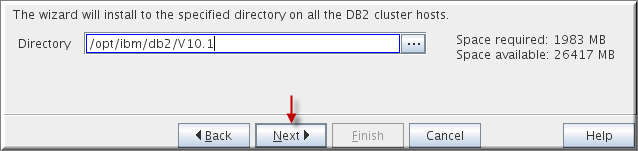
Click Next in the Installation directory step. Keep default settings as is.
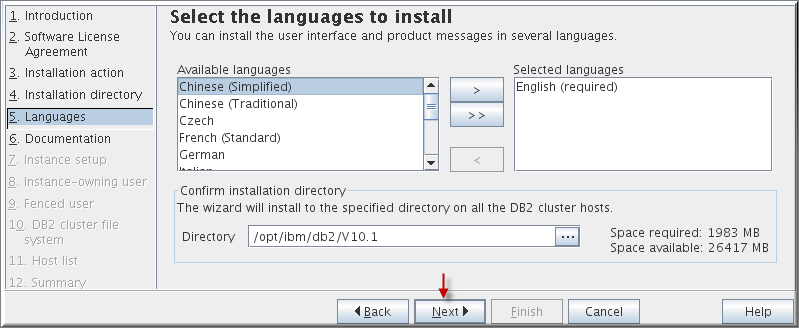
Click Next in the Languages step and keep default settings as is.
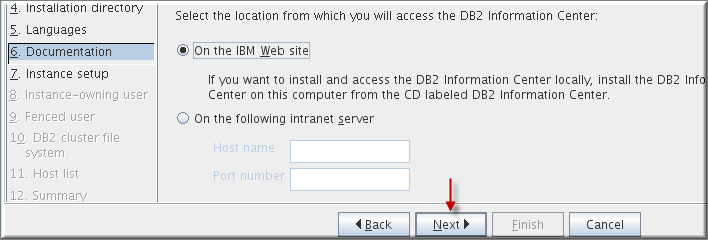
Click Next in the Documentation step and keep default settings as is.
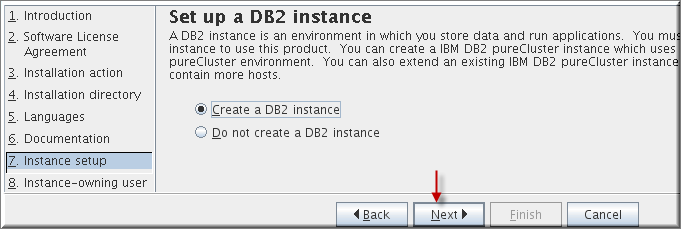
Click Next in the Instance setup step and keep default settings as is.
In the Instance-owning user step, click Existing user and type db2psc. Click Next.
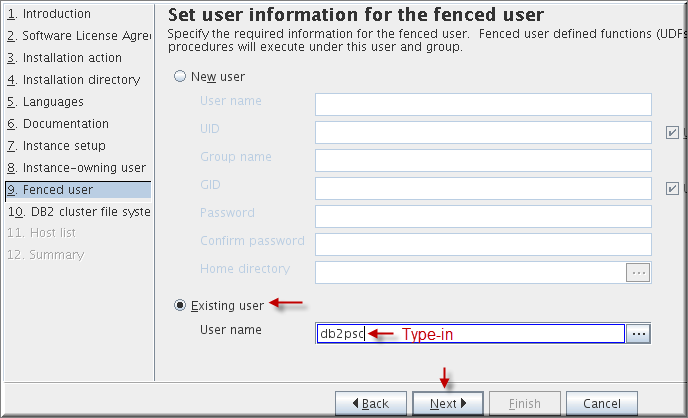
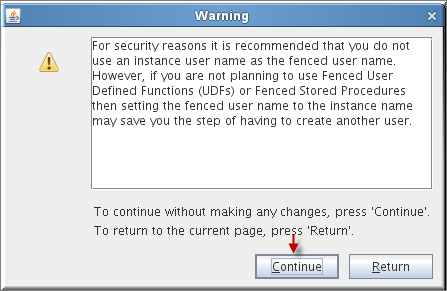
In the Fenced user step, click Existing user and type db2psc. Click Next.
Ignore the warning, click Continue.
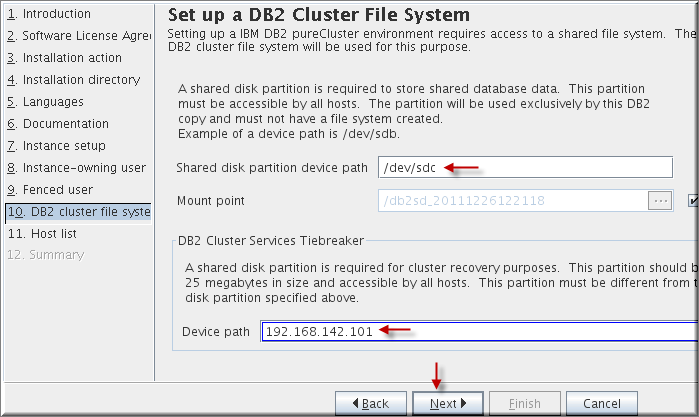
In the DB2 cluster file system step, specify /dev/sdc for the shared disk partition device path and the IP address 192.168.142.101 for the tiebreaker device. Click Next.
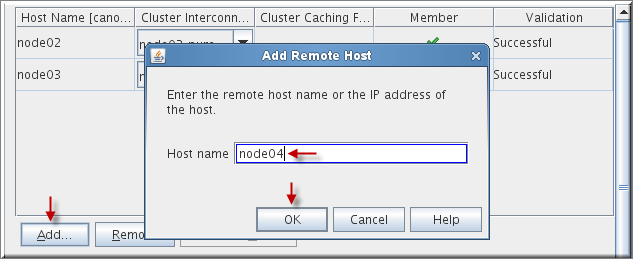
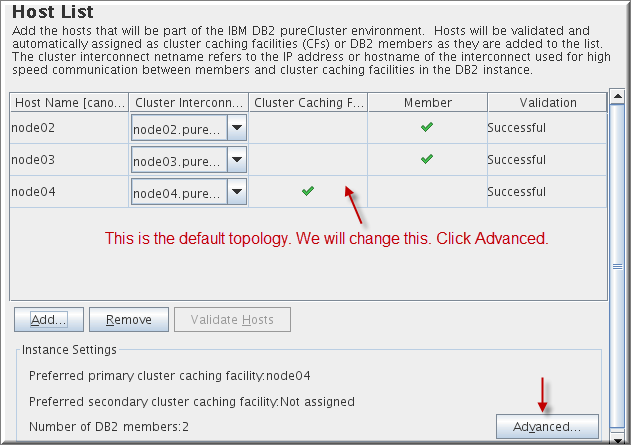
In the Host list step, click Add. Specify host node03 and click OK.
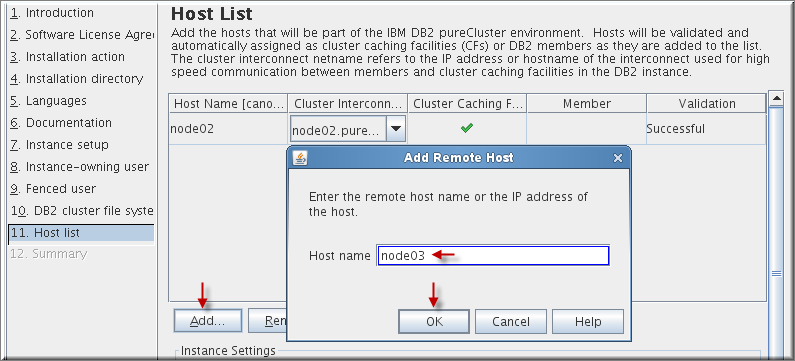
Click Add again. Specify host node04 and click OK.
Click Advanced button.
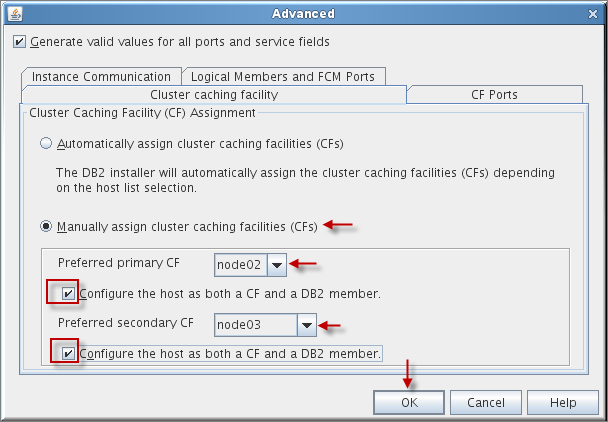
In the Cluster Caching Facility (CF) Assignment tab, click Manually assign cluster facilities (CFs).
Select node02 from the drop-down list for the Preferred primary CF and check Configure the host as both a CF and a DB2 member.
Select node03 from the drop-down list for the Preferred secondary CF and check Configure the host as both a CF and a DB2 member. Click OK.
Notice new topology. Click Next.
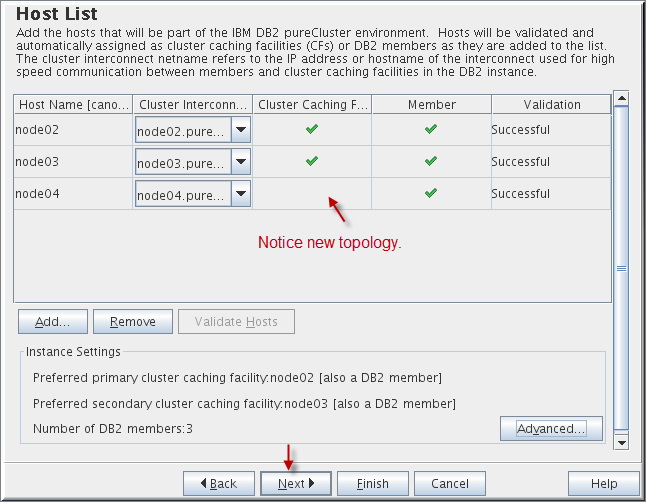
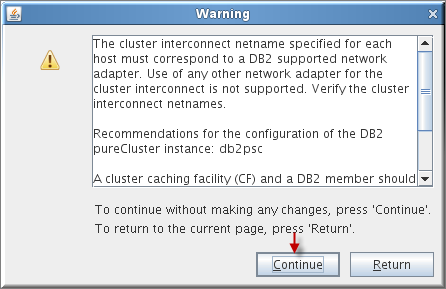
Click Next. It will display a warning about the cluster interconnect and CF and a DB2 member not being on the same host. Click Continue.
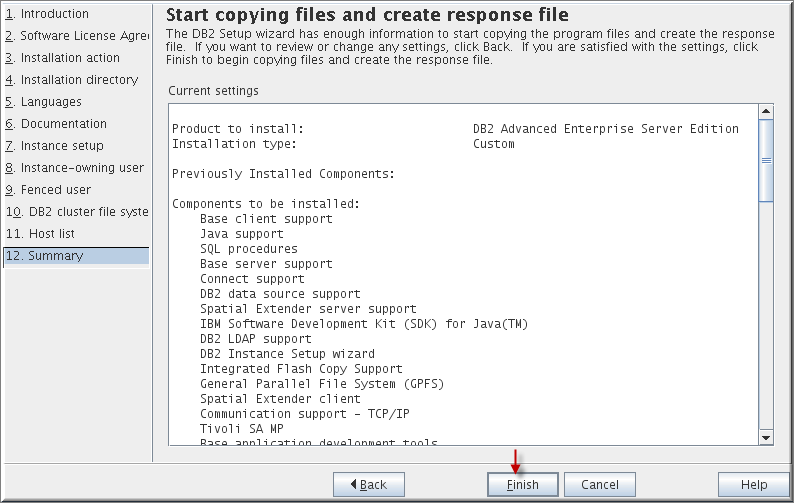
In the Summary step, review choices. Click Finish to start the DB2 pureScale installation, creation of a DB2 instance on node02, node03, and node04, and creation of a CF on node02 and node03 and DB2 members on node02, node03, and node04.
The installation will begin.
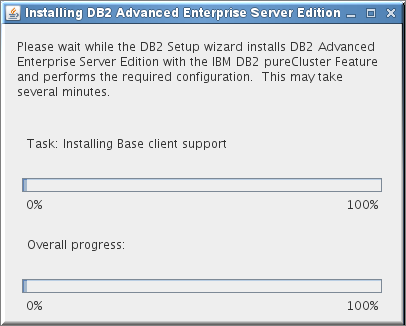
Please note: Please take a break as this will take about 23 minutes to complete.
A Setup Complete panel will be displayed with the status and post install steps. Review the Post-install steps, Log file and Remote Host Status tabs. Select Finish to exit.
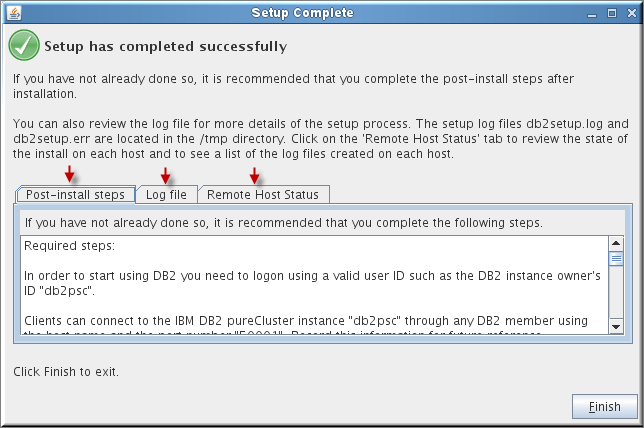
Using the GUI installer, we installed a DB2 feature of pureScale and created a DB2 pureScale instance. The installer did the following:
- Installed the DB2 pureScale feature in /opt/ibm/db2/V10.1
- Created an instance on node02 using a shared disk
- Created IBM GPFS on the shared disk
- Created a primary CF and a DB2 member on node02
- Extended the DB2 instance to the node03 and node04
- Created a secondary CF and a DB2 member on node03
- Created a DB2 member on node04
- Please note that the GUI installer takes care of the GPFS, clustering and creation of the instance.
Explore DB2 pureScale Instance
To bo continued